Ever wonder whether you should you be shooting in Raw or JPEG? Damien Demolder explains the pros and cons of each to help you decide.

Shooting in Raw format will allow you to get the very best from your camera’s sensor, but the benefits have to be weighed against the extra time spent processing and how involved you want to get with working in software. There is a lot of mystery about Raw files and what they are, but there really doesn’t need to be. It’s true that shooting in Raw means more work for the photographer, and that it gives those prepared to do that work in software more options and greater potential for better quality images, but that doesn’t mean this way of working is the sole preserve of the professional photographer. It also doesn’t mean that you have to shoot in Raw format to get good quality images, as with a modern camera set to save files in best quality JPEG mode, excellent pictures are more than possible.
What is a Raw file?
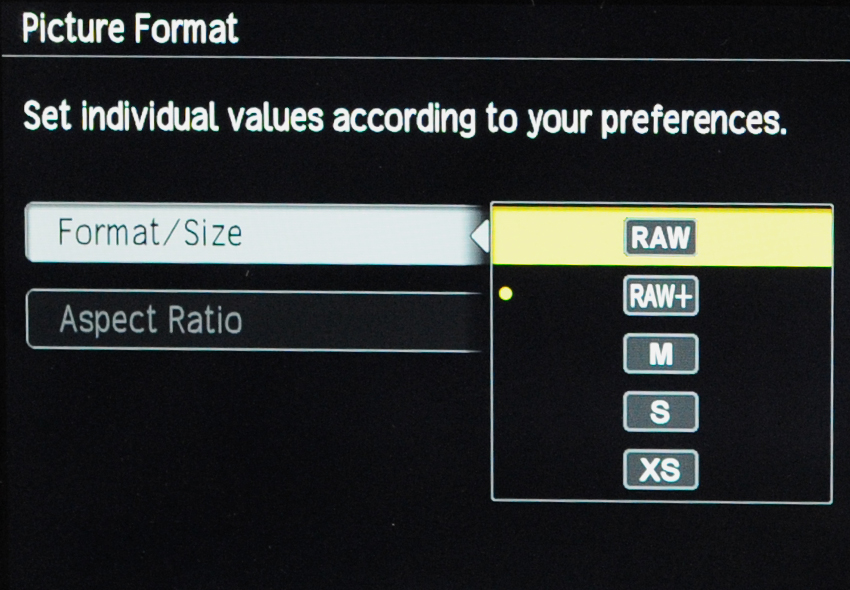
Imagine you had the ingredients for a lasagne spread out on the kitchen table and a ready-made lasagne from a supermarket next to them. The ready-made lasagne might be very nice indeed, with all the flavourings that you like in it. Before you put it in the oven you might sprinkle some more herbs on it and add some more parmesan cheese, and perhaps a grind or two of black pepper. Beyond that, however, there isn’t too much you can do to alter the way it tastes or looks.
If you start with the raw ingredients though, you can make fundamental changes to the consistency and the flavour, as well as the thickness of the lasagne. You can choose to leave out the meat if you wanted, or add spinach to the flour to make ‘verdi’ green pasta to impress your friends. You might use lots of garlic, or none at all, and fry the onions or put them in Raw.
When you start with piles of the raw ingredients there are suddenly many more choices that can affect the outcome, and you have the freedom to make the lasagne exactly the way you want it. You could even make it in exactly the same way as the supermarket did, so it tastes the same and looks the same. Essentially, you have the choice. If you think of the pre-prepared lasagne as a JPEG file and the pile of ingredients as a Raw file, you will start to understand the difference between a JPEG and a Raw file.
JPEG vs Raw: The pros and cons of each
The advantage of shooting in JPEG format is simple to understand. The camera outputs files that are ready to print, or at least almost ready to print, and the photographer is generally not required to do anything else. JPEG images tend to take up less space on your memory card and computer too (as they are compressed), so you can shoot and store more images in less space. Working with JPEGs is convenient and means you can spend less time at the computer – which, in theory, leaves more time for shooting.
The great benefit of shooting in a Raw format is the extra flexibility of the file and the potential to squeeze the best from your camera’s sensor. The flexibility of the files means that colours can be changed and corrected very easily, and detail can be drawn out of deep shadows and bright highlights, areas which might appear almost blank in JPEG images. The camera might underexpose a person who is backlit or in a scene that contains something very bright in it, and while you can make some corrections in a JPEG, the overall image quality will suffer. Yet, if you have saved that scene as a Raw file, there’s a good chance you can recover the detail from even very dark shadows without degrading the image.
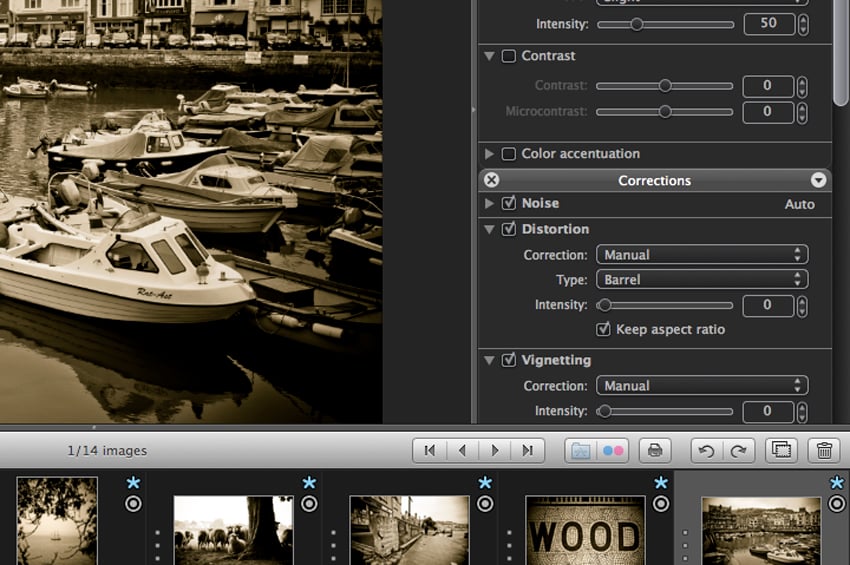
With Raw files we can step away from the camera’s idea of what the recipe for the picture should be, and we can take control of every situation. Many cameras, for example, oversharpen their JPEG files, but in Raw mode we can reverse that to sharpen the image according to the way we want it to look.
The greatest disadvantage with shooting in Raw is that you then have to work on the image in software after the event. If you have captured your images carefully and all the images can be processed in the same way there may not be too much work to do, but there is still at least that extra step. If your images are all different and shot in a range of situations the processing can take a long time, but if image quality is your primary motivator for taking pictures you will find the time well spent.
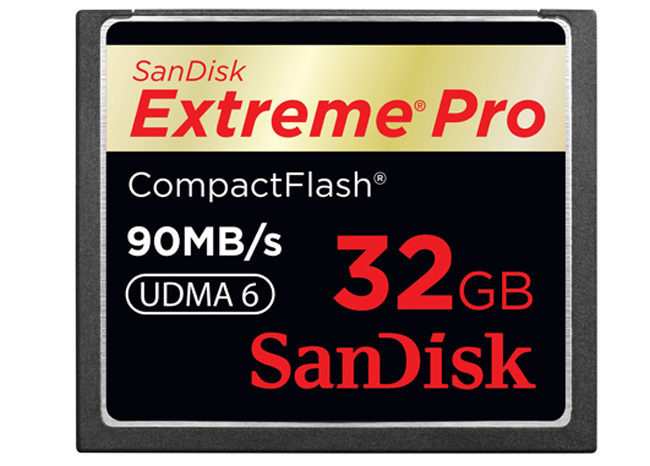
p>Shooting in Raw mode also uses a lot of memory, both on the card and in computer storage. Raw files are much larger than JPEGs as they have to store the finished lasagne as well as all the spare ingredients – the bag of flour, the extra onions, garlic and spare bacon – should you want to make changes. Just as people who cook a lot need more cupboard space than people who buy their meals prepared, those who shoot Raw need more memory storage than those who shoot only JPEG.
Once you have worked on a Raw file you will want to save a copy, so then you end up with two files instead of one – the original Raw file and the newly-created corrected version that you have processed. You may also wish to save additional copies, such as black and white conversions. In any case, starting your processing from the Raw file is recommended, rather than from any JPEGs you have captured or created. If you’ve already processed a Raw file there may be a sidecar file with any edits you made saved alongside it, so that if you ever want to go back and process a Raw image again you don’t necessarily need to start from scratch.
Processing a Raw file involves a degree of skill and experience, but if you allow yourself the time to work slowly at first you can test each of the options in your software package to see what it does. You will quickly get the hang of things.
The coward’s way
I find the solution that works best for me is to shoot everything with the camera set to save Raw and JPEG versions of my pictures. I work hard in-camera to do what I can to ensure that the JPEGs will be useable, and that I won’t have to do too much processing in software, but if things don’t work out, or the scene is more than a JPEG can cope with, I have the Raw files to work with.
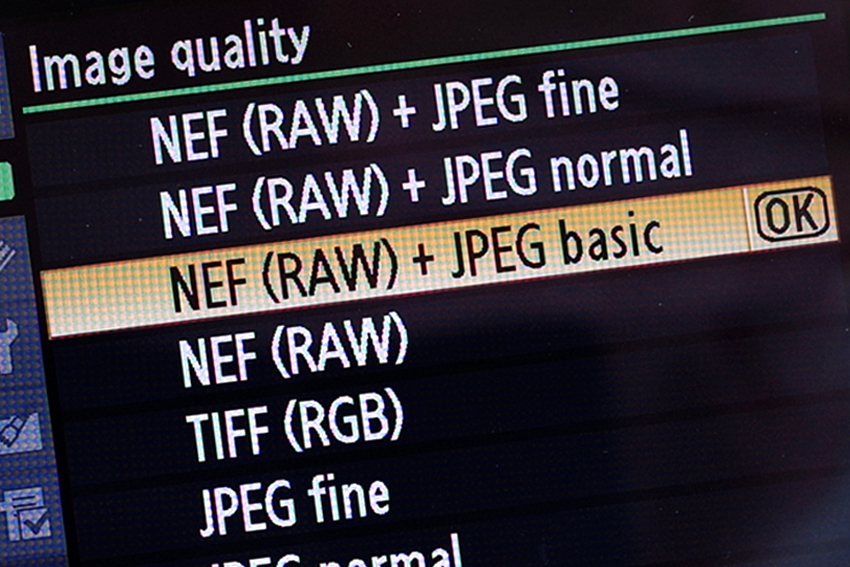
I have found too that I can go back to old Raw files several years later and get better images from them than I could at the time – either because software has moved on or because my photography has. Although JPEGs are easily readable by almost all software programs, and in that way are future-proof, Raw files can actually improve with age.
Other software options
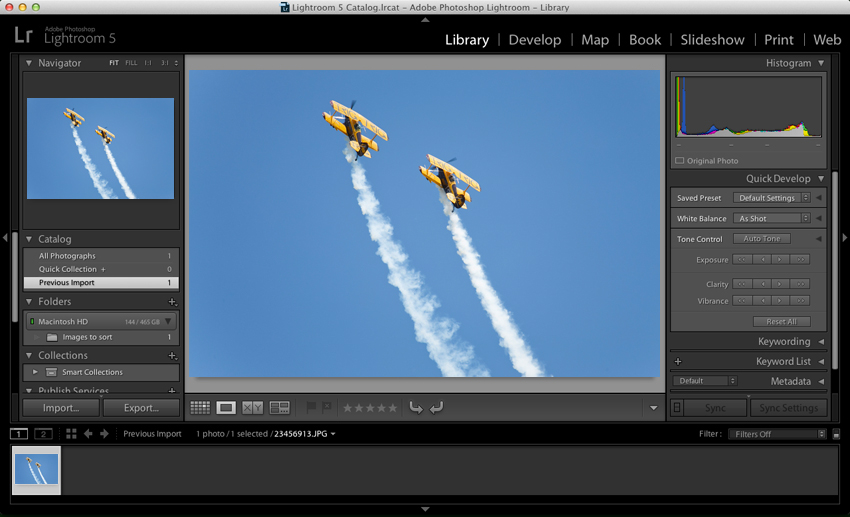
All cameras that shoot in Raw format come with some sort of software that allows you to work on the files, but some are better than others. Standalone packages, such as Adobe Lightroom, Capture One, DxO Optics Pro, Corel Aftershot Pro and Silkypix often offer a great deal more functionality than the software that comes bundled with the camera, and sometimes better results too. If you have a Canon EOS camera you will also have the DPP Raw conversion program, which is very good and means you don’t actually need to buy anything else.
Examples in practice
Getting some background back
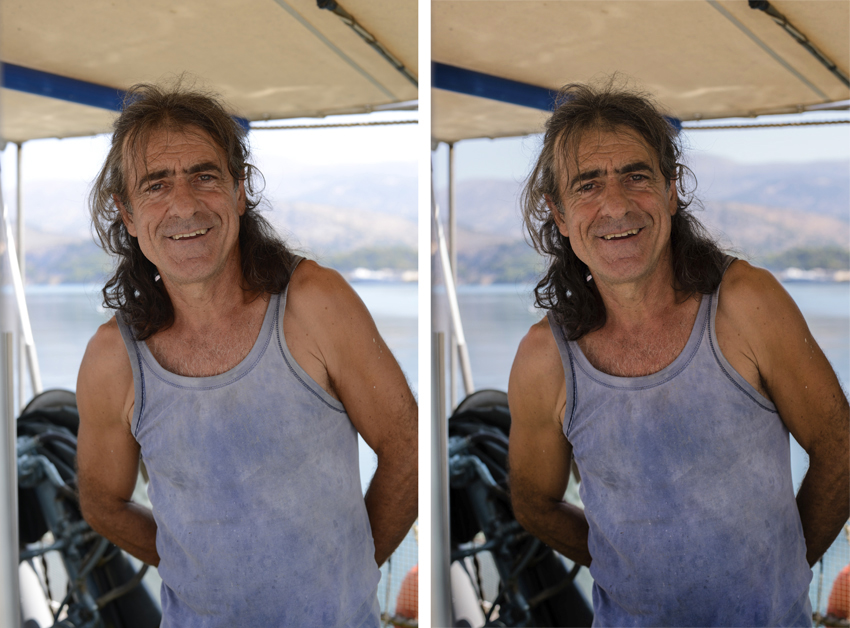
When I shot this picture I purposely positioned the camera to include some of the hills in the distance to give the viewer a little detail about the location. As you can see though, the difference in brightness between the fisherman’s shaded face and the hills in the full sun was too great for the JPEG file to describe. I tried to darken the JPEG to get some hill detail back, but had very limited success. The camera did record all the detail I needed, but in fixing the ‘exposure’ to make a print-ready image, the brighter parts of the scene have been lost in the JPEG file. All that information is still present in the Raw file though, and by drawing in the brighter tones I have been able to make that detail appear. And that makes a much more successful image.
Correcting colour shifts
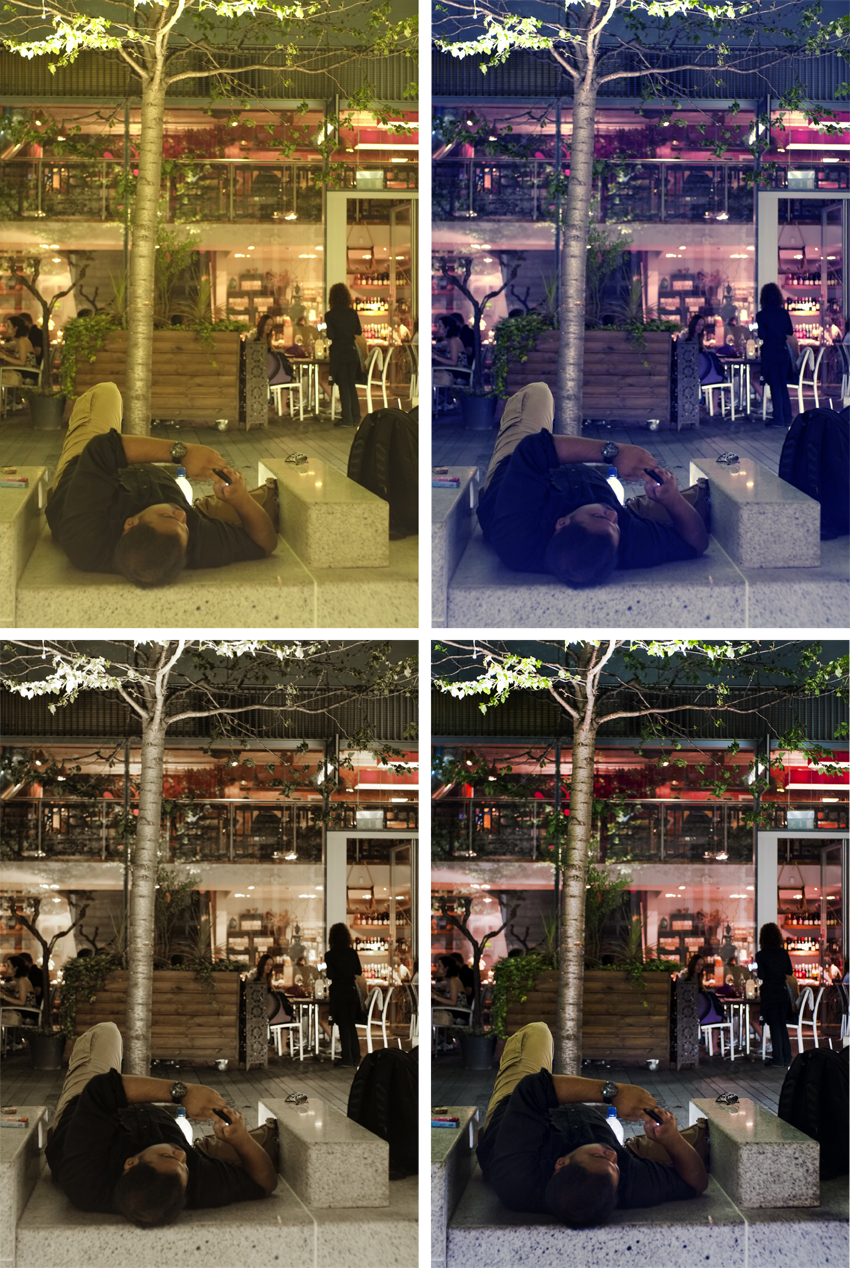
The degree to which we can alter the colours of a JPEG file is really quite limited. There is a lot that can be done, and some success can be had, but when the shift needs to be dramatic the results can lack realism.
Here, the camera was set to the daylight white balance setting when photographing under tungsten lighting. Using the Levels window I tried to correct the JPEG file by taking a grey sample from the frame of the door; this tells the software that this area should be a neutral grey, and the software then shifts the colours to correct it. The software has done a great job of correcting that door frame by removing yellow and red but the JPEG file doesn’t have enough spare colour ingredients to balance the colours in the other areas of the shot. With the yellow and red removed we are left with too much blue and cyan. Instead, I tried a manual desaturation of yellow and red which works a bit better, but the result is rather colourless picture.
Working with the Raw version of the shot, I switched the white balance setting from daylight to tungsten, and the colours adjusted their proportions to deliver a realistic and fully balanced colour image. The difference is that the Raw file has enough colour information – even about colours it may not be using originally – to be able to replace those that we take out. When you remove colour from a JPEG file what is left is a gap in the information that cannot be filled.
Recovering burnt-out details
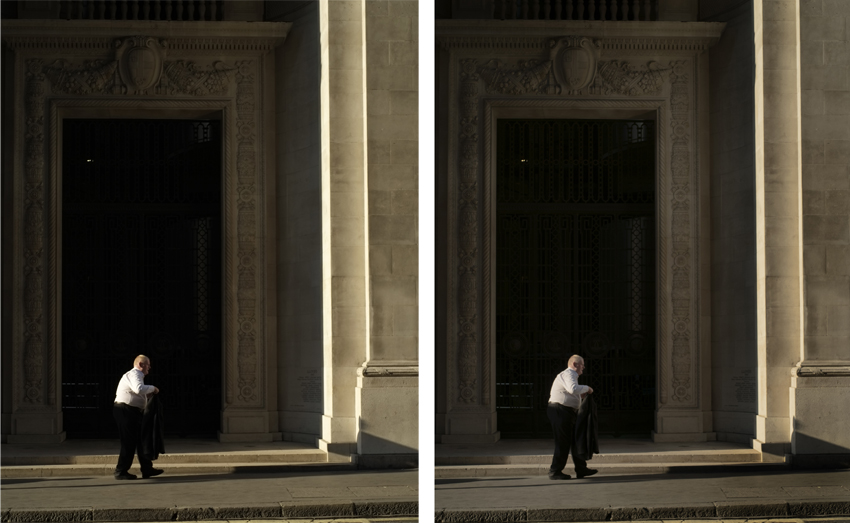
On this particularly sunny day the JPEG file was not able to cope with the brightness difference between the man’s shirt and the dark doorway behind him. Where the sun falls on his back the detail is burnt out, leaving nothing but plain featureless white – and that is never a good thing in a picture.
The camera did record all the information I need though, and in the second image you can see how that information comes out when I produced a low-contrast version using the Raw file. Of course, without the drama of the deep and bright tones the picture is much less interesting. The atmosphere can be returned though, but through using mid-tone contrast rather than by creating hard blacks and bright whites – which is what the camera will do.
Do you use software to process your images? Let us know below!
About the Author
Damien Demolder is a independent photographic consultant and former editor of Amateur Photographer magazine. Damien also runs a number of photographic events and courses for photographers of all abilities. For more information visit his website.
Related articles
DxO Optics Pro 9 review
Beginner’s guide to DSLR video
7 common image processing mistakes – and how to avoid making them


