Landscape photographer Kirk Norbury explains how to back up images in the field and at home to ensure they’re always safe.

Backing up your images is a crucial way of life for the modern-day photographer. The chances of memory cards corrupting and hard drives failing should make you think hard about how you are protecting your precious moments captured with your camera – and most photographers you ask will probably have at least one experience where they have lost images due to not backing up properly or having a card fail on them.
In the following guide, I’ll explain how I back up my images when I’m out in the field and once I’ve returned home, and also run through a few additional options.
In the Field
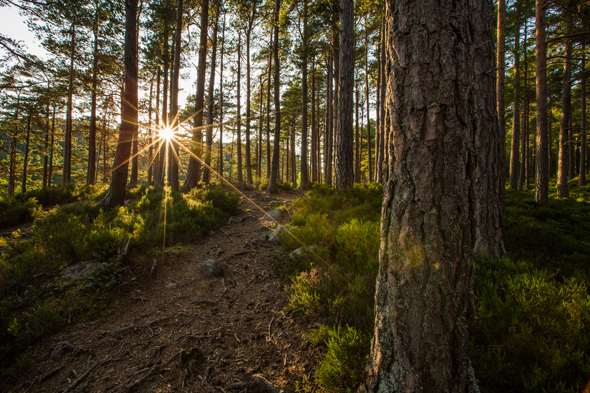
While out in the field I’m always considering how to make my images safe and reduce the chance of losing anything. The most common way people lose images while out on location is by physically losing their memory card, either from it falling out of a pocket or through misplacing it.
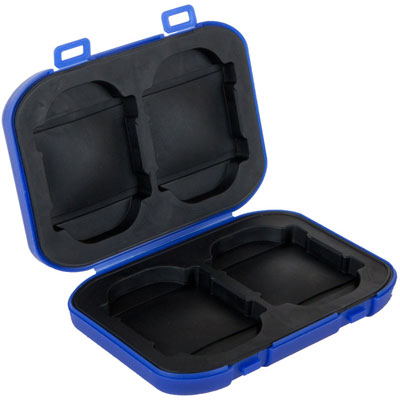
I recommend getting yourself a wallet for storing your cards and keeping it close at all times. I use a waterproof hard case that can store up to eight SD and four CompactFlash cards and it stays in my pocket at all times. No card goes loose in my pockets or in any of my bags – they always go into my case so I don’t lose track of them.
If your camera has multiple card slots, I recommend backing up your images to the second card just in case something happens to the main one. You can either backup the images as JPEGs or Raw files, but bear in mind that if you back up the images as Raw files it will quickly slow down the camera’s buffer rate. So, if you’re at a wedding or sporting event, for example, I would recommend backing them up as JPEGs, but if you’re shooting landscapes or something else that doesn’t require continuous shooting, you’ll be fine backing up Raw files. This is a great way to have an instant backup of your images.
Portable storage device
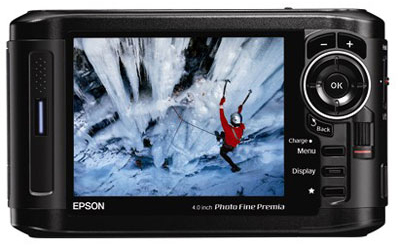
A portable storage device is a small, handheld hard drive that accepts a memory card, allowing you to instantly download your shots to the device. The great thing about these is that you can view the images on the display, and while you don’t see many people using these anymore, they can be very handy for backing up your images out in the field. The most common brands over the years have been the Epson Storage Viewer and the range from HyperDrive.
Laptop

This is the most common practice by photographers when out on location. As a time-lapse photographer I can fill up many cards in a matter of hours, so I always travel with my Macbook Air and an external hard drive. When a card is filled I’ll get out my laptop and instantly back up my images to the internal drive, and also copy these images over to a 1TB G-Tech portable hard drive as a second backup. I do not format my cards until I desperately need them, which gives me three copies of my images at one time (and peace of mind in case something fails or goes missing).
Wi-Fi-enabled hard drive
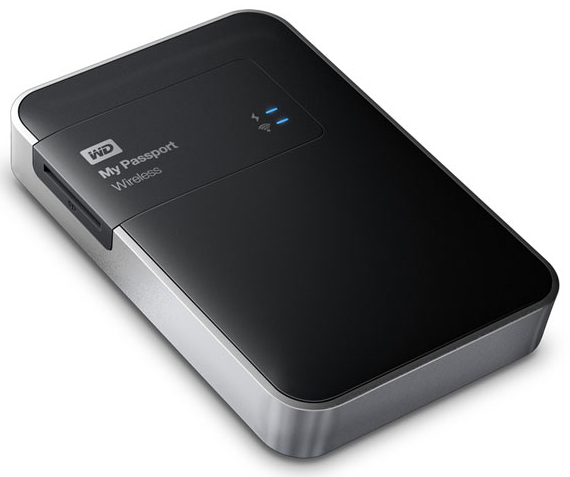
Western Digital recently brought out a new portable hard drive, the WD My Passport Wireless Wi-Fi Mobile Storage, into which you can insert an SD card or a card reader for CompactFlash cards and quickly back up images to the drive. Thanks to the on-board Wi-Fi, you can even back up to eight other devices wirelessly, and you connect it to a smart device like an iPhone or iPad for viewing images too. With its internal battery I can see this being a great addition to a photographer’s bag and it’s definitely something I can see myself using in the future.
At Home
Once you’re home from your shoot, you need to take your images into your main computer and create a permanent backup strategy. Creating a safe backup at home can be very easy to setup so there is no excuse for not having one. Here are some tips:
Backing up to multiple drives

My backup system in my office is very simple but means I won’t lose any sleep at night. It involves first uploading the images to my master hard drive which in this case is a 3TB G-Tech Thunderbolt drive. I also have another 3TB drive that clones the main drive every day, although this means if I accidentally delete something and don’t find it within the day I’ll lose it forever.
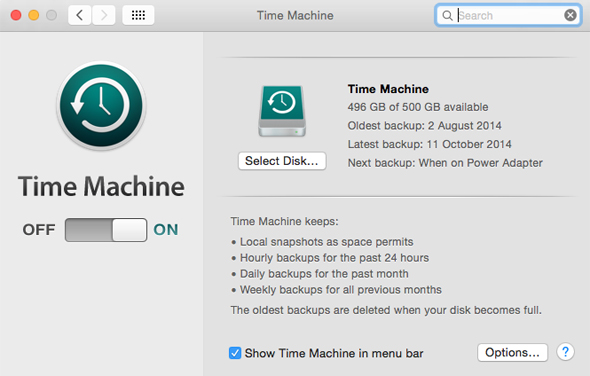
To fix this I use another 3TB hard drive and Apple’s Time Machine software to create another backup of the master drive. This means if I delete anything I’ll be able to recover it. I also have a couple other backups of the master drive, one kept in a safe just in case of a burglary and another in a separate location in case of a fire or anything worse.
Backup your operating system
I always recommend you have a backup of your operating system in case your computer dies. It’s great having a backup of your images but if your computer fails you could be spending weeks installing software, creating Lightroom catalogs etc. I recommend using Time Machine and also cloning your hard drive.
Backup Lightroom Catalogs
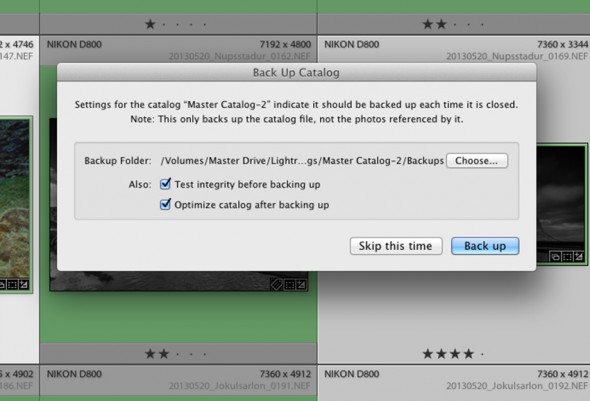
This is an easy one to miss. If you are an Adobe Lightroom user you should have a backup of your catalogs and the information stored within them. In Preferences you can set when Lightroom backs up your catalog and settings (I have set this to back up to a certain folder every time I close the application). I then copy these files and also the .lrcat file over to a USB flash drive as a second backup. This is very simple to do and could save you a lot of time if anything goes wrong.
Separate Your Drives
Most people store all the drives within a couple of feet of their computer. This isn’t a major issue as you need them to back up your images, but if someone burgled your house they would be able to take all drives in one go. It’s a good idea to keep at least one drive at a separate location, somewhere safe you could go to regularly to update.
Cloud Storage

There is a good chance you’ve heard about saving your images and files to ‘the cloud’. It’s been around for a while but it’s only taken off in the last couple of years. Backing up to the cloud is basically saving your images to an off-site server, where images will be safe and you can access them easily wherever you are. Cloud storage can be quite cheap, from a couple of pounds per month depending on the space and product you require. It’s a great idea but the only drawback is that, for the initial upload, a 1TB or so of images will require a fast internet connection if you’re to get the job done quickly. Once it’s done you don’t have to worry about anything. Dropbox, Google Drive and also Apple’s iCloud service are the most popular options.
Organise Folder and File Structure
Having your images organised will make backing up easy and painless. I have my images set in a certain way that works really well for me. I start with a folder of the year, then I make a folder for the images with the date backwards and the project/location (’20150325 Turnberry Lighthouse’, for example). The images inside the folder get a similar naming structure but also include the file number and underscores (so, ’20150325_TurnberryLighthouse_0001.NEF’ and so on). This system has worked for me over the last few years and I’ve found it really helpful for finding images quickly, but there are many different ways that you can do it. Don’t make it too complicated as it’ll start to become frustrating when searching for an image.
Automate It!
The worst thing you can do is back up everything manually; I highly recommend using software that automatically backs up your images at a set time. I have an application back up everything at 11am each day, and if my computer isn’t on at this time, it will automatically run when I turn it on.
You may be reading this and thinking that I’m quite paranoid but I’m only like this because I care about my images. Whether it’s pictures of my family or of a beautiful waterfall, they’re precious to me, and they all get treated the same as I want to be able to look back at these in years to come without worrying about finding them. Backing up can be very simple and once you’ve developed a routine with it, everything will feel natural and there will be nothing to worry about.
About the Author
Kirk Norbury is a nature photographer and cinematographer based in Ayr, Scotland. You can find out about the workshops he runs and view more of his work on his website.


