In a mess with Lightroom’s Raw editing process? Geoff Harris shares some easy ways to work quicker and smarter…
Lightroom has become the Raw editing weapon of choice for many people, and it’s easy to understand why. The program offers a raft of editing features in a relatively straightforward interface that conceals a lot of hidden power. It works in a different way to most other image editing programs, however, and this can cause some confusion.
To help you make the most of Lightroom’s awe-inspiring ability to process lots of Raw files, here’s a quick guide to some of the more common ‘workflow’ pitfalls and how to avoid them. For the purposes of this article, ‘workflow’ simply refers to the process of importing, editing and saving out Raw files, usually as a JPEG or TIFF.
1. Losing track of pictures
Lightroom is basically a database program, which keeps track of the edits you have made to a Raw file. These edits are only applied when you save out a JPEG or TIFF from the original Raw file, but the original Raw file is unchanged. You could save out multiple edits of the original Raw file, without changing it. This is why Lightroom is called a ‘non-destructive’ editor.
All well and good, but Lightroom can lose track of where the original file is if you are not careful – say you import an image from a memory card, which you then disconnect from your PC, for example.
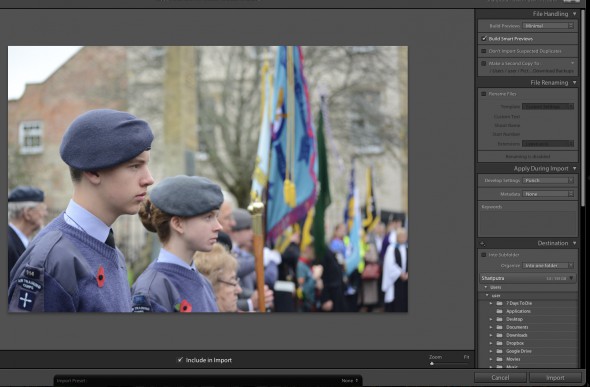
To avoid this, make sure you create ‘Smart Previews’ when you import images. These previews are smaller than the original photos, while still enabling proper editing (and when your memory card is re-connected, for example, any edits you make to the original file are applied instantly to the Smart Previews as well).
So, select Build Smart Previews when you import new pictures in the Lightroom ‘Catalog’ or main image database. It can take a while on a large Raw import, but is worth it.
2. Not using QuickDevelop
When you are about to import images into Lightroom, you can do quite a lot in the ‘Quick Develop’ mode, so don’t be in too much of a hurry to copy everything over into the main ‘Develop’ editing window.
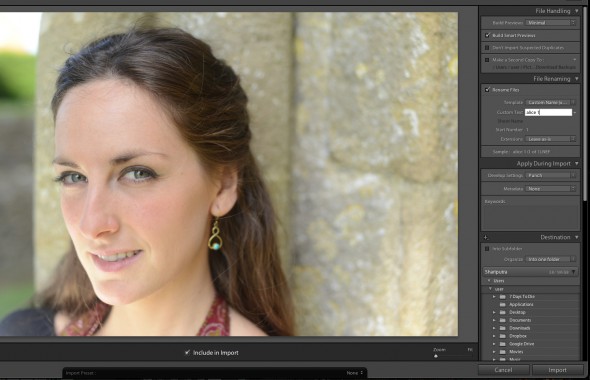
You can rename the images, for instance, so they easier to find, or tell Lightroom to save them into a certain folder, as opposed to the default one on your PC or Mac. You can also add presets, or pre-saved edits, to all the files imported from here, which is a real time-saver if you want all your images to have a certain look.
As well as the default presets that come with Lightroom, any third-party ones you install will also be stored here (you can also create and apply your own). This is a much more efficient method than manually applying presets one by one. Don’t forget that Quick Develop also enables you to make basic exposure tweaks and change white balance.
3. Not rating images properly
Before you hit Import, are you absolutely sure that you want to import all of the selected images?
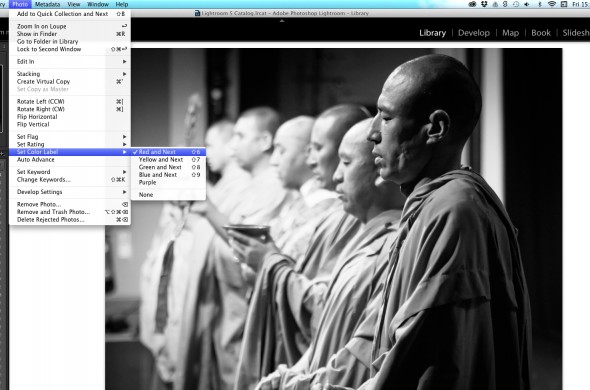
It’s easy to dump everything into the main Lightroom Catalog, but it can get very big and unwieldy. So only install the real keepers. Once the images are imported into the main Lightroom Develop area, you can then rate them, which makes it easier to sort and save out later.
View images at 1:1 (100%) so you can check for sharpness, and be ruthless with what you let through. Via the Photo menu, it’s easy to set a colour rating or star rating; you can then arrange to only view your top-rated images when it comes to saving them out, for example.
4. Not using Collections and Smart Collections
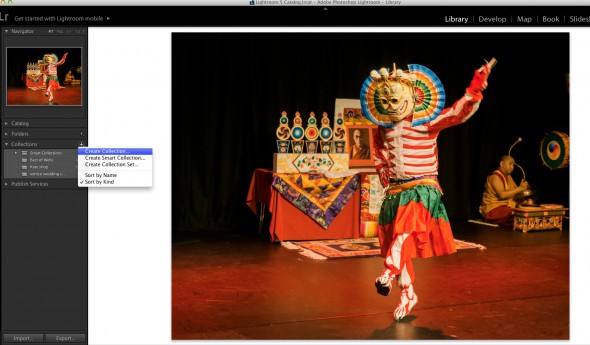
Use Lightroom for a while and you will notice that the main image ‘Catalog’ or database in the Develop mode will rapidly fill up with a lot of pictures. Soon you can end up with many thousands, which can make it hard to track down images from a certain shoot easily.
So, rather than trawling through this massive image Catalog each time, why not store related images in special folders, called Collections?
Simply go to the Collections pane over to the left of the main Develop screen and click the + sign. Give the folder a name and add the images. You can also create powerful and automated Smart Collections, where all the images you have rated as five stars are stored for easy retrieval, for example.
5. Not saving out properly
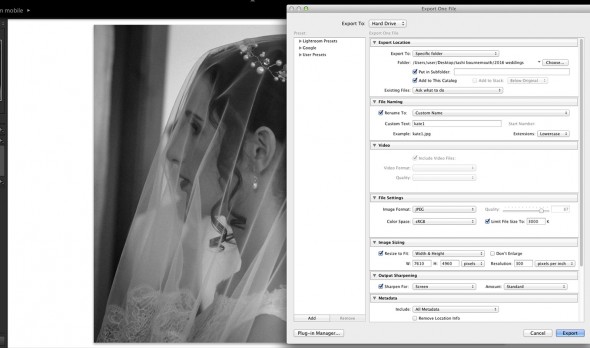
Once you have finished making your edits, make sure you make the most of the Export box when saving out. As well as enabling you to save out from the Raw file as a JPEG, TIFF, etc, you can rename the image again or save it in a different location.
This box has lots of other useful extras, too. You can set the resolution and dimensions of the image, or specify its maximum size – useful if you are saving out images for the web or Facebook, or need to email images to somebody. You can also add a final burst of sharpening, depending on whether the image will be printed or used digitally.
If you have selected a group of images, this Export box will apply each of your parameters to each image, updating the file name as necessary.
About the Author
Geoff is an experienced photography journalist and recently stepped down as editor of Digital Camera, the UK’s best-selling photography magazine. He now writes for a range of publications. Geoff is a keen travel and portrait photographer, and a Licentiate of the Royal Photographic Society.


