Automotive photographer Dom Romney reveals 10 ways to get maximum performance from your graphics tablet.

I’ll admit it: I’m an addict. I’ve been using a graphics tablet for nearly six years and it’s become a fundamental part of my workspace. For me it’s a quicker and more intuitive way to work than using a mouse; once you’ve used a tablet you never go back.
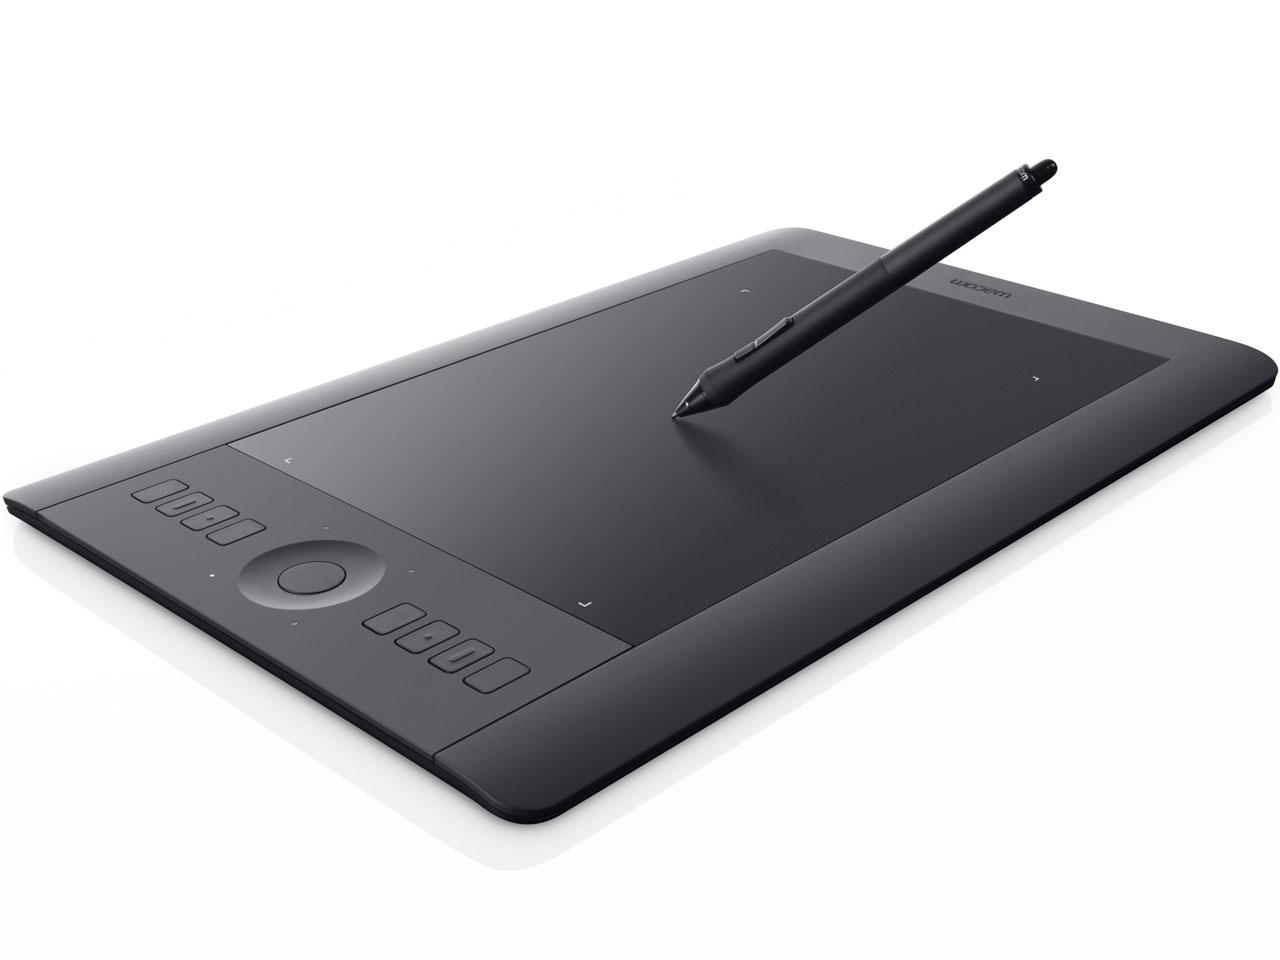
My current weapon of choice is the large version of the Wacom Intuos 4. I’ve used all sorts of tablets – from tiny to massive – but I find that anything about 12x8in in size provides a great balance between being small enough to reach both sides with ease but large enough to give you fine control when you need it.
When you first start using a graphics tablet it can feel quite odd; nothing like using a mouse and not that much like pen and paper. Here are ten tips to make using a tablet that little bit easier.
1. Use different nib types

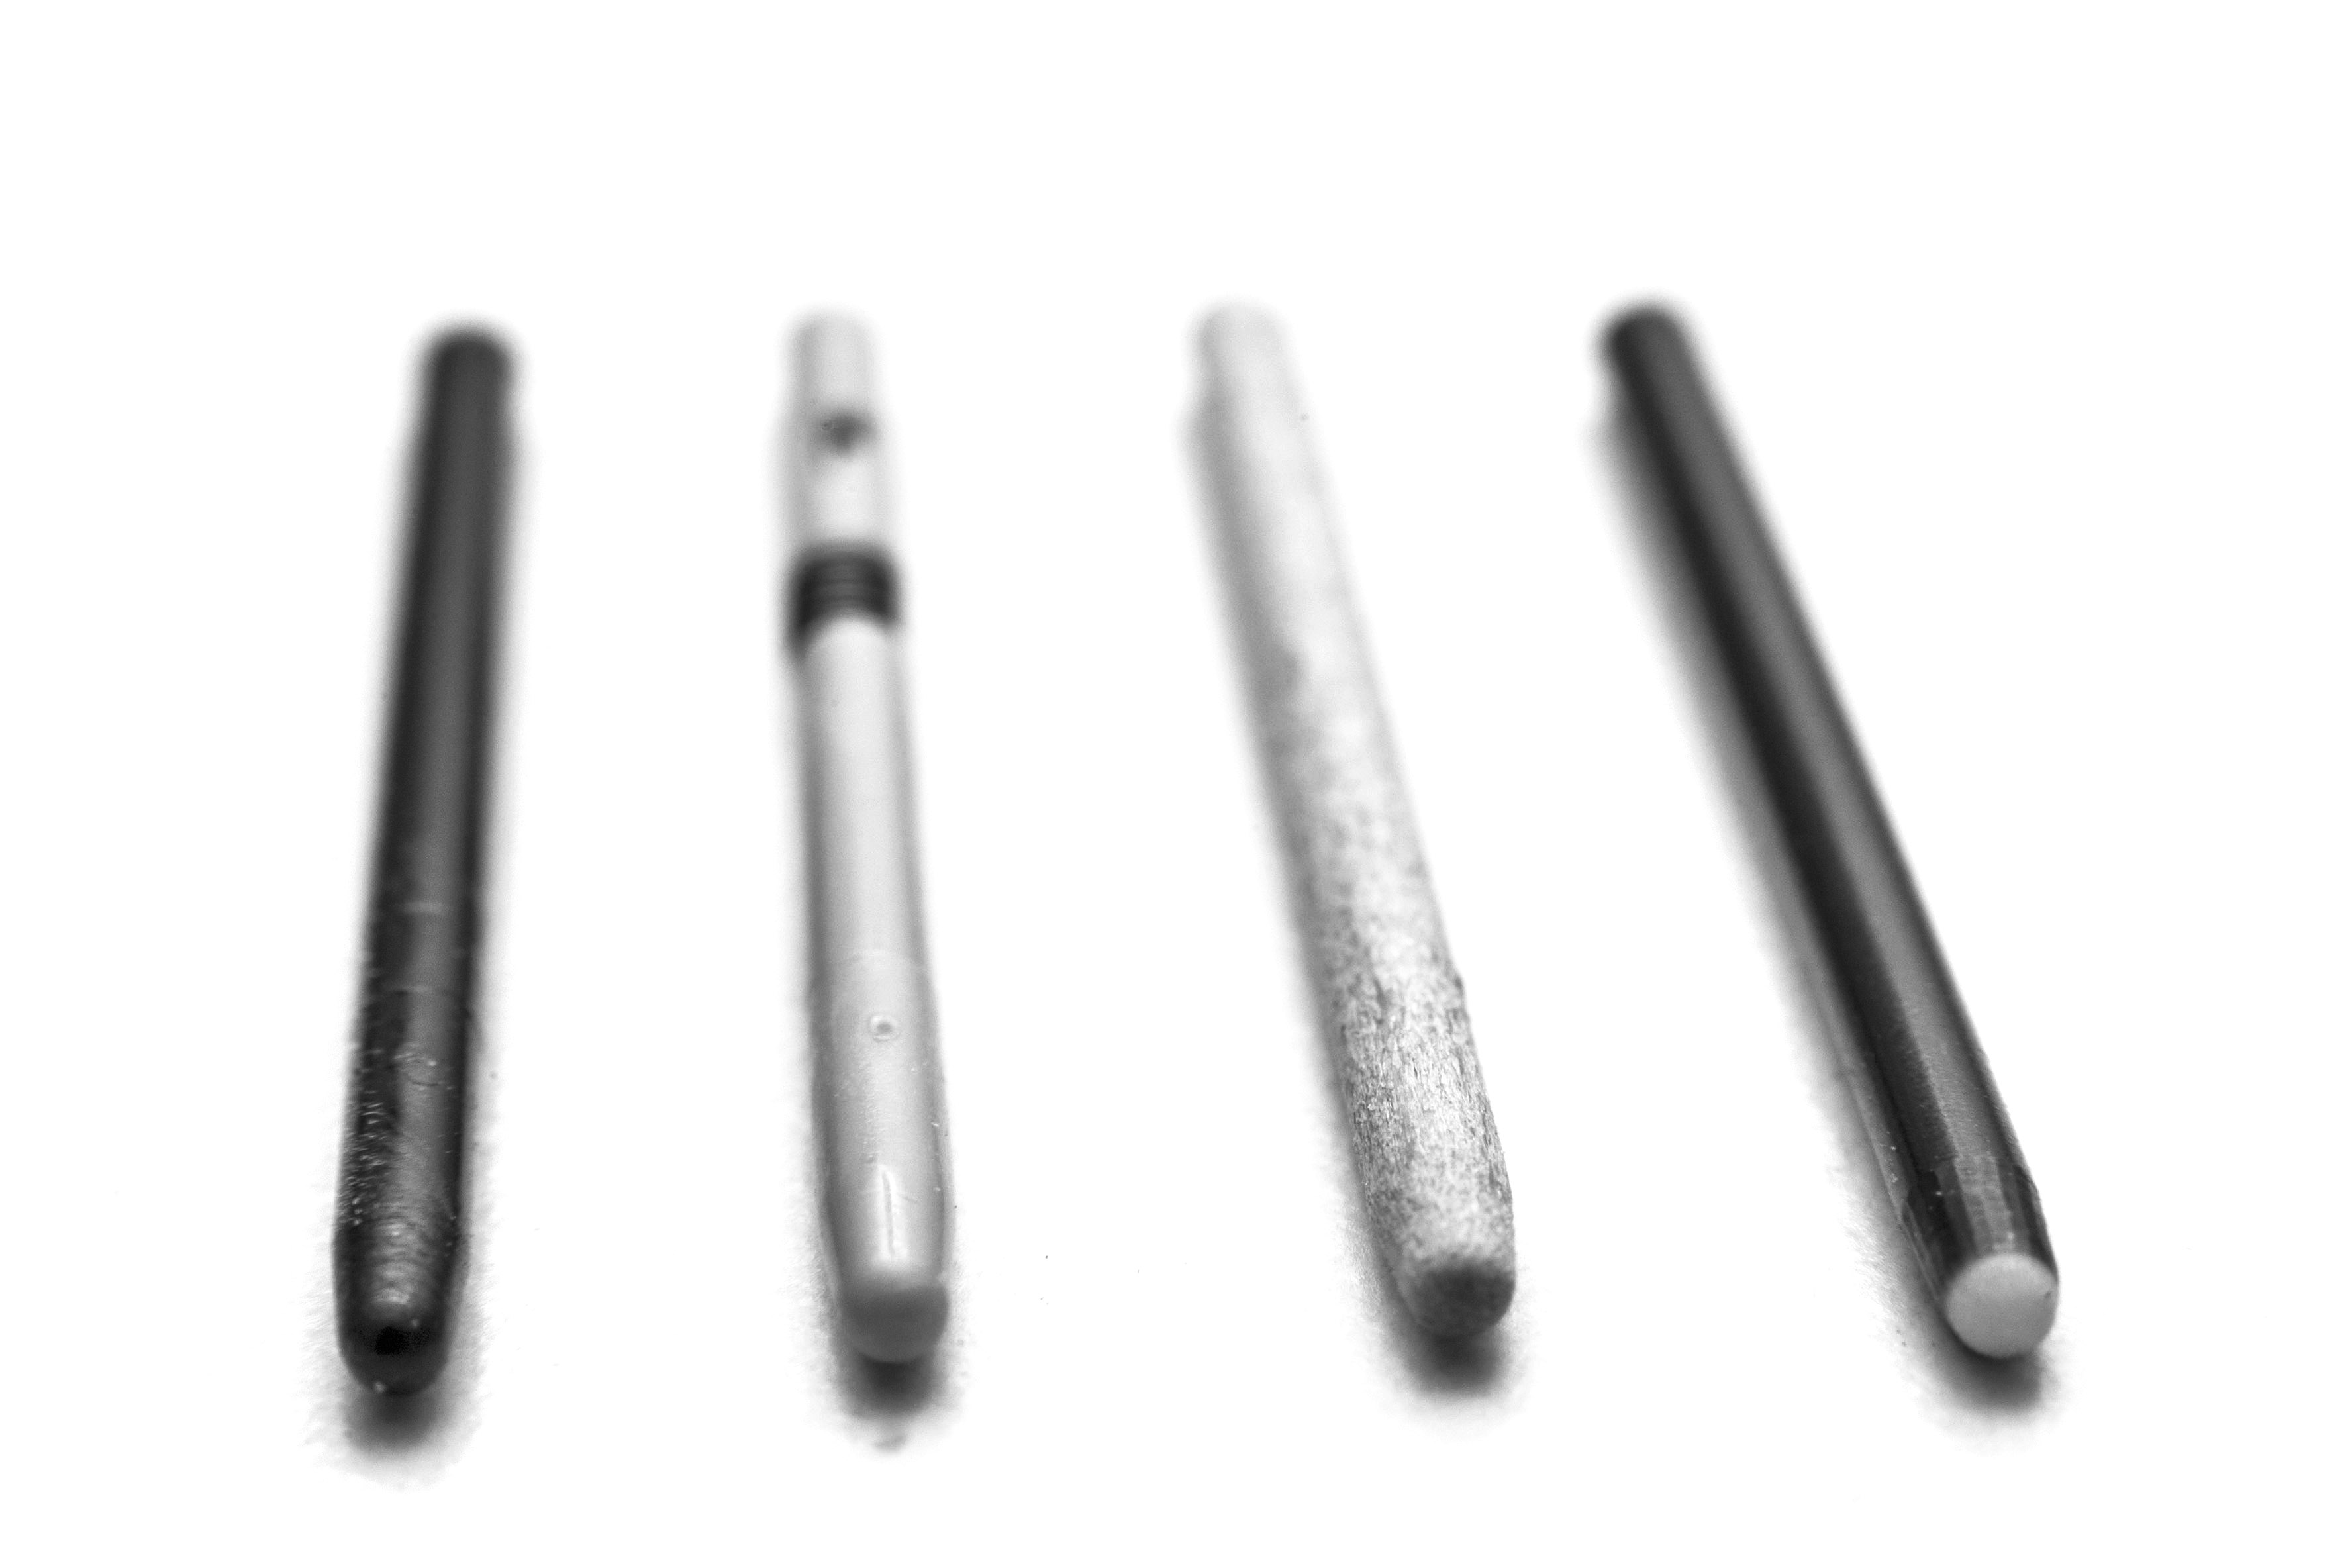
Be sure to try out different nib types as they each offer a different feel and feedback on the tablet. For me, the traditional hard plastic nib that comes with the Wacom tablets is too hard and slides too easily over the tablet surface, so I use the hard felt nibs that are designed to mimic the feel of a felt-tip pen. I find the resistance that it gives helps me be a bit more accurate, which is useful when working with particularly fine details.
Wacom supplies four different nib types: standard, hard felt, stoke and flex. Hard felt is designed to feel like a felt-tip pen, while stroke is designed to simulate a brush. Flex, meanwhile, is designed to feel like pastels. Experimenting with the different types can help you gain a better idea of which type is suitable for different tasks.
2. Move your tablet to centre stage
I see a lot of people using tables like they use a mouse, with the keyboard in front of them and the tablet off to the right. This is fine for everyday use but you wouldn’t draw a picture like that – so why retouch your pictures this way? Throw the keyboard away, leave the words for the academics and get your tablet front and centre.
3. Use Shape Dynamics

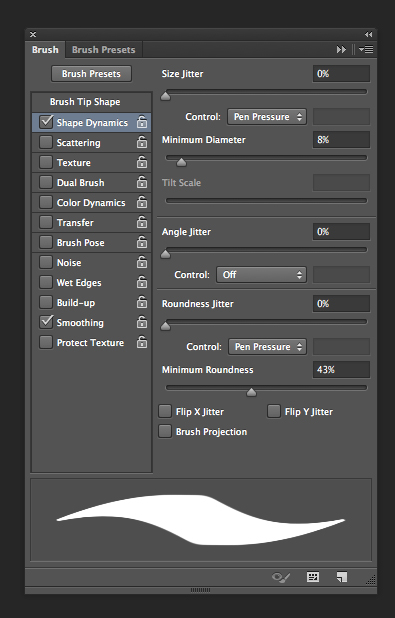
I spent a lot of my early photographic career processing photos in darkrooms and doing lots of dodging and burning. For those of you that have never dodged and burned in a real darkroom, there is something really organic and analogue about the look you get this way that you really struggle to replicate in post-production. It’s just almost too perfect. However, with a tablet you can use a feature in Photoshop called ‘Shape Dynamics’ to help put some of the organic feel back into your tool control.
To turn it on, go to Window > Brush and tick the box next to Shape Dynamics. You’ll then need to set size jitter and roundness jitter to control by pen pressure. There are a number of additional settings on how the pen pressure affects the brush; I recommend opening a blank document and having a play around to best understand how the different settings affect your brushes. You can set different settings for your different brush tools (Dodge, Burn, Clone and so on).
4. Use Layer Masks
Nearly all graphics pens come with two pressure-sensitive ends, typically a pen at one end and an eraser at the other. I really dislike the Erase tool in Photoshop; if you want to remove something from the image, you’re far better off using the non-destructive method of Layer masks. Most tablets will allow you to change the eraser end of the tool to a function. I use the burn tools a lot so I have this set to the eraser end, which allows me to quickly jump to the burn tool as and when I need to.
5. Set yourself up to reduce fatigue
The chances are you’re always going to be using your tablet for long periods of time, and there is nothing worse than fatigue when you are trying to do an intricate task. A good office chair is a must; mine has adjustable arm rests, which allow me to rest my arm on the chair and let my wrist float free over the tablet. I can work like this for hours and it really helps stabilise my arm.
6. Use shortcuts
I know in tip 2 I told you to throw your keyboard away, but go grab it out of the bin and set it up off to one side of your tablet. As you draw with one hand you can bash out keyboard shortcuts with the other. This saves you having to move your cursor back and forth to the tool bar, which in turn allows you to focus on your retouching.
7. Fine-tune your tip’s sensitivity

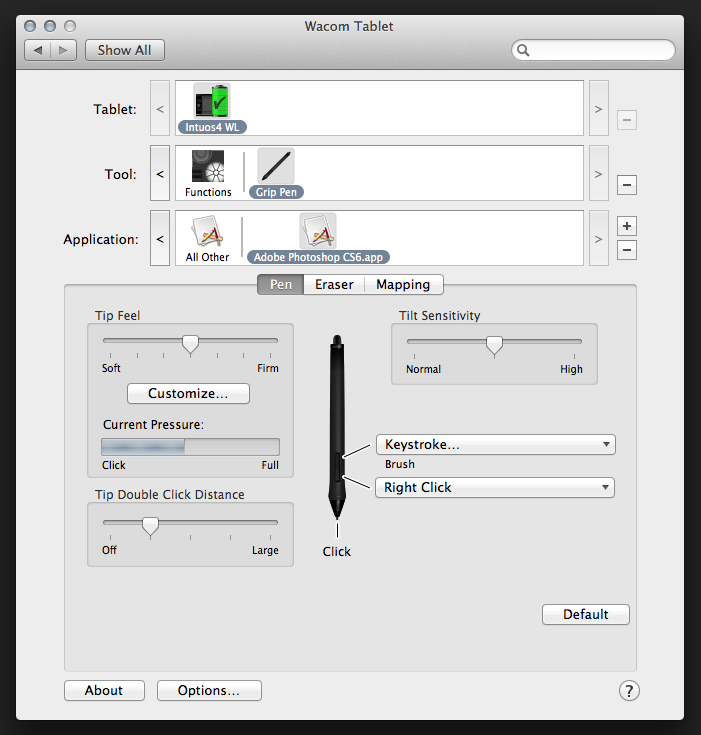
To really fine-tune how your pen responds to your inputs, you need to customise the tip feel to how heavy handed (or not) you are. Out of the box, most pens are set up with a middle-of-the-road tip-feel pressure setting. This is can be fine if you’re quite heavy handed, but if you’re quite light fingered as I am, you’ll struggle to press with enough force to register full pressure – and if this is the case you’re not using the tablet to its full abilities.
You can find the tip feel settings in the Preferences window. Most come with a handy gauge to show you just how much pressure you’re applying. When setting it up you need to find a balance between easily being able to apply full pressure and still having enough control and finesse to apply light touches.
8. Take advantage of right-click functionality
Make sure to set right click up on the pen buttons, especially if you’re using a Mac. When you have a brush tool selected in Photoshop, right click will let you change the brush type, size and hardness, which you may find to be a useful shortcut. Most tablets let you change this in the Preferences window.
9. Set your mapping to full
Make sure your tablet maps the entire screen. Some tablets give you the option to reduce the area of the screen(s) in which the tablets work, and this is handy if you have two screens as you can restrict the tablet to work on just one. For editing work, however, you want to use all the real estate that your screen has, so make sure that your Mapping is set to Full.
10. Practice!
If you’ve spent your life using a mouse, tablets can feel odd when you first start using them. Drawing in front of you is a unique sensation, but it can take a while to get your head around seeing the effects on a screen. Stick with it and the benefits will really take your editing to the next level!
Thinking about buying a new graphics tablet? Click here to view our range
About the Author
Dom Romney is a London-based professional automotive photographer who has captured advertising campaigns for the likes of Jaguar Land Rover. You can view more of his work on his website.


