Creating a panoramic image is a fantastic opportunity to capture stunning wideangle vistas. Kirk Norbury explains how to photograph and edit to best effect.
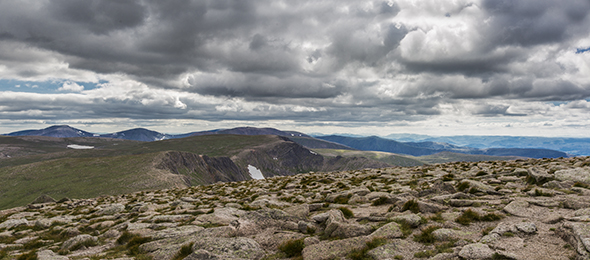
When you’re out photographing nature in all its beauty, have you ever wanted to capture more of the scene? Or would you like your camera to produce images of such high megapixels that the shot could be printed on a billboard? If yes, then you may benefit from learning how to create a panoramic photograph. In this article I will go through the techniques that I use to create high-quality panoramic shots.
A panoramic photograph is made of many images that are then stitched together creating a wide-angle shot of a scene. The word panorama means ‘all sight’ in Greek, as used by painters to describe a wide view of a landscape. Photographers have practised the art of panoramic photography since the late 1800s, when they would overlap pieces of film onto photo paper in a darkroom. A very tricky task indeed!
These days, all types of photographers are using their cameras to create high-quality panoramic images – from landscape photographers to architectural photographers. The benefit of creating a stitched image is that there will be a lot more pixels in the shot, meaning that printing it very large shouldn’t be an issue. Such shots are also great when you want to show more in your image and do not have access to a super-wide-angle lens.
Types of Panorama

First off, I want to talk about what sort of panoramas you can create with your camera. To achieve some of the images on the below list, you will need photographic software, of which there is an abundance on the market.
- Wide-Angle Panorama: these cover a wide area of a scene but less than 180 degrees, commonly used to create a wide-angle lens effect if you don’t own lenses like a 14mm
- 180-Degree Panorama: very wide images covering 180 degrees of a scene
- 360-Degree Panorama: this type of panoramic image will cover a full 360-view of the scene
- Spherical, aka Little Planet: created with special software found in Photoshop and other applications, these panoramas turn your shot into a small world
Equipment
- Camera: any camera will do, as long as it can shoot in Manual mode
- Lens: most lenses will do fine, but I prefer lenses around 24mm-50mm best as wide lenses can create a lot of distortion, which can make things difficult
- Tripod: for a sharp and even panoramic shot you will need a tripod and ball head
- Shutter release: this will help reduce camera shake when taking the shot

Manfrotto 303SPH Panoramic Head
Technique

Step-by-step:
- Once at your chosen location, the first thing you need to do is set up your tripod. One thing people always forget is that the tripod needs to be level, as when you start moving the camera it could slope downwards or upwards and ruin your shot. If your tripod has a spirit level on it, level the tripod first.
- When placing your camera on the tripod, you will most likely place it horizontally on the ball-head. This will work well for a very long and wide panorama but I find placing the camera vertically a lot better, as you will capture more of the foreground and the sky. It also helps when cropping the final shot, plus it will also be a higher resolution due to the extra pixels.
- Test the move before taking the shots to make sure everything is level. When you’re happy with it, make sure all the knobs on the tripod head are nice and tight.
- Fix your camera settings accordingly (I will talk about this in detail below).
- Turn the camera to the left of where you want to start, lock everything down and take your first shot. Then, looking through the viewfinder or live-view screen, move the camera right by 50% of what you can see in the viewfinder and take another shot. Doing this will give you enough overlap to help the software render a good panoramic image.
- Once you’ve finished all the shots, double-check them on the LCD to make sure they’re sharp and you’re happy with the overall shot.
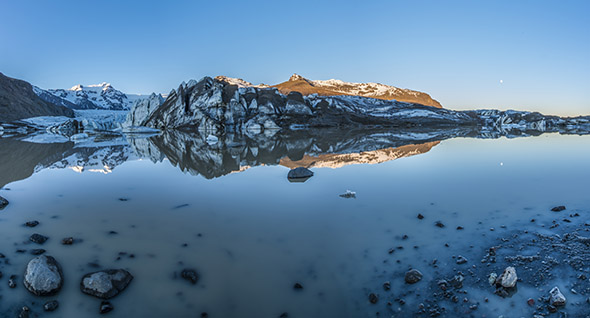
Camera Settings
- Shoot in Raw as you will have more control over the editing.
- Some cameras have built-in panoramic software – this is great but I still recommend compiling the shots together in Photoshop or another application as it gives you more control.
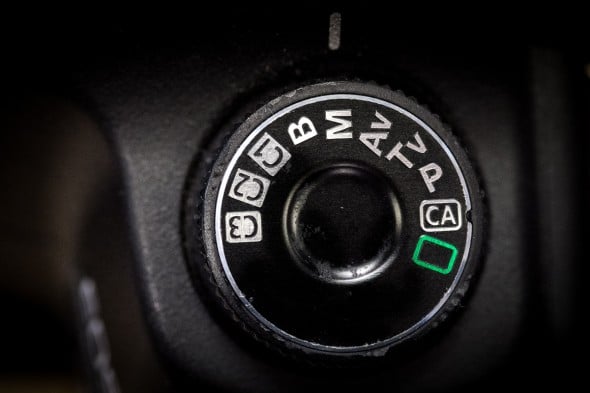
- You will need to shoot in ‘Manual’ mode, as you don’t want the exposure to change in any of the shots.
- Also set your lens into manual mode, as you need the focus point to be same in each shot.
- Set your aperture to a narrow number for maximum sharpness, so anything between f/8 and f/16 should be fine.
Using Adobe Photoshop/Lightroom
When editing my panoramic shots, I always edit in Photoshop as it does such a good job at rendering the files quickly and easily. There are several ways you can import the images into Photoshop but I find that it’s best to first import them into Lightroom for some initial editing. Below, I’ve laid out the steps I take to process a panoramic shot.
First, I import the images into Lightroom, then I edit the first image by adding some global adjustments, i.e. exposure, contrast and saturation. Then, I copy and paste the adjustments onto the other files so they all look the same.
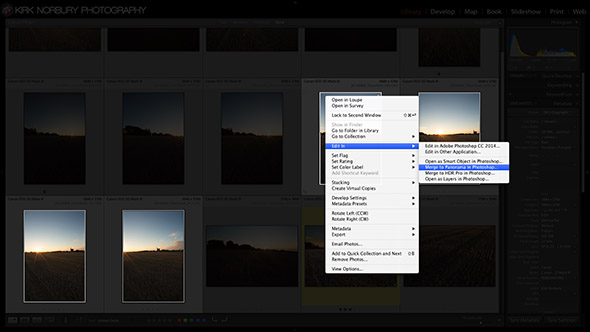
Next, I select all of the images, right-click on one of them and then navigate to > Edit In > Merge To Panorama In Photoshop…
Once in Photoshop, a box will appear with your selected images asking you how you would like to render them. I leave it in Auto and make sure that Vignette Removal and Geometric Distortion Correction are both selected.
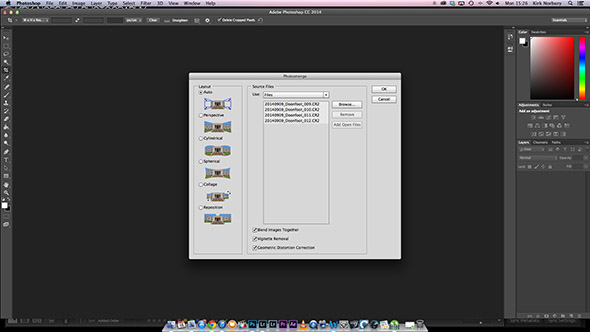
From here, Photoshop will do its thing. Depending on how many images you’re stitching together, this could take a while – so I find this a good opportunity to put the kettle on!
Once all the images are stitched together and separated by layers, I apply some cropping to get a more pleasing composition and then re-import the final shot into Lightroom for some final editing.
If you don’t have access to Adobe Photoshop, there are other applications you can try. I find STOIK PanoramaMaker very good and simple to use. You get a free trial for 15 days and then it costs £32.40 to buy. Another application that is just as popular as Photoshop for panoramic photographers is PTGui, which is considered more for professionals – a personal license will cost you £65.
Things To Remember
- Shoot in manual mode
- Make sure your tripod is level
- When shooting with your camera in the vertical position, using an L-Plate on your camera will keep the centre of the camera above the tripod. This will help prevent parallax issues
- Don’t forget you can do vertical panoramas if you want!
Conclusion
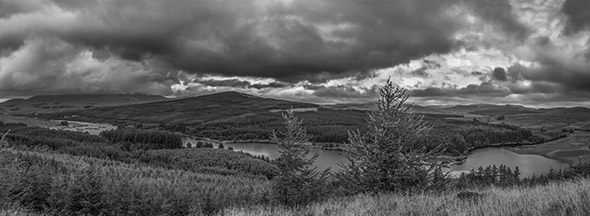
Panoramic photography can be really rewarding once you get the hang of it. Your images will be full of detail and printing one to fill the wall of your house will not be an issue due to the high resolution. Most of the wide panoramic images that I create have between 10,000 and 20,000 pixels on the longest side. Some people have taken panoramic photography to a whole new level by creating Gigapixel images, which stitch together multiple high-resolution images to achieve a huge shot featuring over 1 billion pixels.
It can be frustrating at first taking panorama shots as there’s quite a lot to remember to get it right – and you may start pulling your hair out. Trust me, though, with time you’ll appreciate the quality of the images and wonder why you hadn’t done this before.
About the Author
Kirk Norbury is a nature photographer and cinematographer based in Ayr, Scotland. You can find out about the workshops he runs and view more of his work on his website.


