#NoFilter? No problem! Kirk Norbury demonstrates how to create cool long exposure effects without using an ND filter
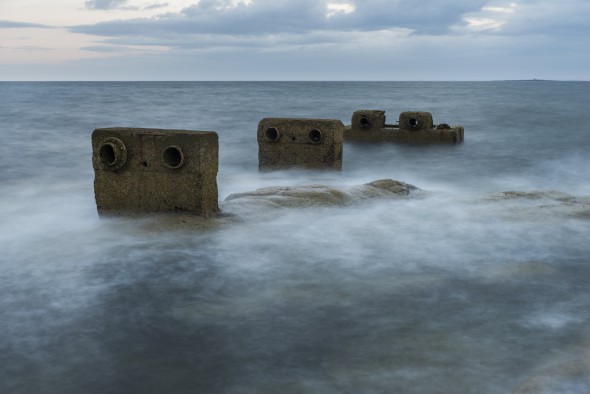
Using an ND filter for your photography is essential for controlling your exposure and creating a desired effect. It decreases the amount of light that reaches the sensor, enabling you to use a longer shutter speed to give you silky water and wispy clouds.
But have you ever left your ND filters at home and found yourself wanting to create an image that looks like a long exposure? Well, in this article I’m going to show you some unconventional ways of creating long exposure photographs without your trusty ND filter.
Multiple Exposures
Most cameras these days have a great feature built into them that enables you take multiple shots and then have the camera combine them all to create one image. This for the most part is used by portrait photographers, allowing them to combine an image of a person with an interesting background, but it can be great for long exposures.
Using the multiple exposure mode on a Nikon camera can allow you to take up to ten shots (depending on your camera model), so if for example your shutter speed were 1 second, the final exposure would give the effect of 10 seconds.
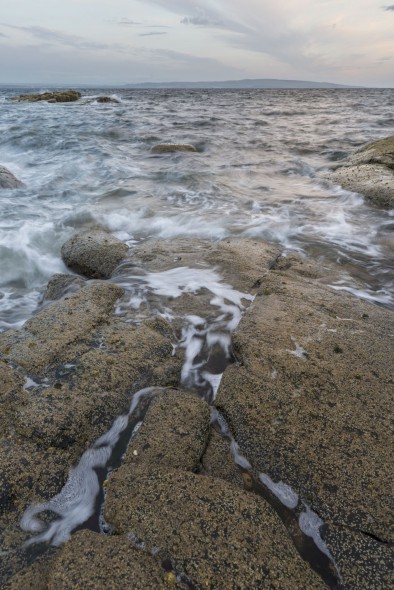
Before multiple exposure effect is applied
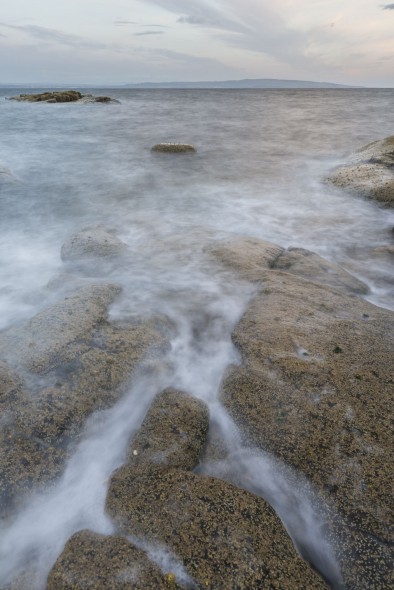
And after
Gear Needed
There are only two bits of equipment you’ll need to make this happen: a sturdy tripod and a remote shutter release. The camera cannot be allowed to move while taking the shots, so these two items will help eliminate any potential for camera movement.
How It’s Done
- You want to set your camera up on a tripod first. Then make sure everything is set to manual, this includes the lens. As you are wanting the slowest shutter speed you can get, I’d recommend setting the ISO to 100 and using a small aperture, e.g. f/18. Check the exposure is correct by taking a test shot.
- From here you want to go into your camera’s menu settings and find ‘Multiple Exposure’. It will ask you how many shots you’d like to combine – you want as many as possible, so with my Nikon D800 I would select 10. Auto Gain should be switched on as this automatically ensures that all the exposures are identical to each other. If you are using a Canon camera the same setting is known as ‘Average’. Switch the mode to ‘On’ and you are ready to go!
- Instead of using a shutter remote, which would be perfectly fine, I use the on-camera timer so that when I press the shutter button nothing will happen for two seconds. The camera will then take all ten shots and instantly combine them to create the final multiple exposure image.
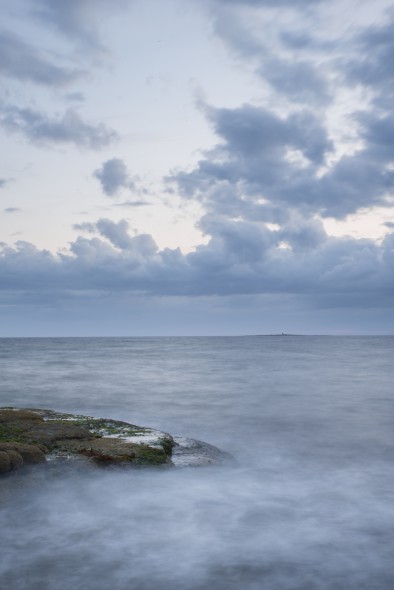
Before
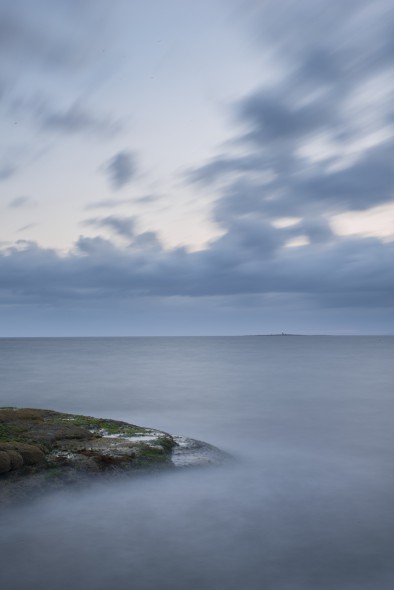
After. The smooth water and streaked clouds make for a more dramatic and interesting image
Things To Remember
- This will not work in all circumstances – if you are out during a very sunny day, your slowest shutter speed isn’t going to be slow enough that using a multiple exposure would be worth it. If it’s a waterfall you’re photographing then this shouldn’t be an issue due to how fast the water is moving.
- If you did remember your ND filters you could put one onto your lens and still create the 10-shot multiple exposure for an even longer final image. So for example if your shutter speed is 30 seconds long your final image will look like an exposure of five minutes!
- Make sure to turn off ‘Long Exposure Noise Reduction’ as this can create weird-looking gaps in the final image.
- This technique doesn’t work well for everything. For example, if there are people moving in your frame you are more likely to have the same person appear several times in the shot. I find that this method works best with nature where you don’t notice the overlap as much.
Stacking In Photoshop
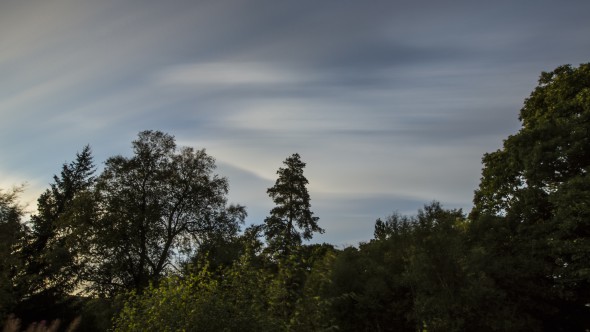
Another way of creating long-exposure images without an ND filter is by taking a large number of images and then combining them all together in Photoshop. This is very similar to creating a time-lapse, but instead of creating a video you’ll get a still image made up of all the images you’ve taken stacked on top of each other. I find this technique works best if the multiple exposure method isn’t enough, and for the best results I will take anywhere between 20 and 50 images.
For this process you’ll need two things – a tripod and a shutter remote. Follow the same steps as for taking a multiple exposure, but this time you want to take more than ten images and you’ll need to do it manually. Each shot needs to be taken straight after the last, so that when they are all blended together there are no gaps.
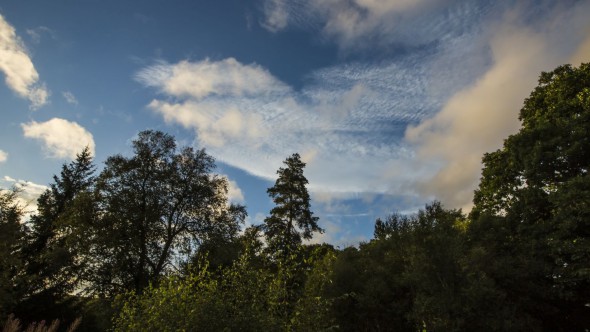
Before stacking
How It’s Done
- After manually setting up your camera on a tripod, setting the exposure and focusing the lens, you need to the set the camera to continuous shooting. This way it will keep taking pictures until you stop or the buffer fills up.
- Now that you’ve got all the images you want to open them as layers in Photoshop. If you feel the camera or tripod may have moved while you were taking the shots, you can select all the layers and then go Edit > Auto-Align Layers.
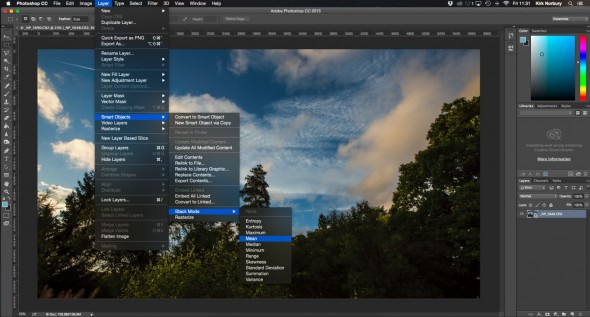
- Next you will need to turn all the layers into a smart object. Select all the layers and go Layers > Smart Object > Create Smart Object.
- When it has created the smart object you want to then select Layers > Smart Object > Stack Mode > Mean. This will then start to combine all the images into one final image that looks similar to a long exposure.
After stacking
Things To Remember
- Using fast memory cards will help you capture more images before the buffer fills up. If you are still struggling to get a decent number of shots, try reducing the frames per second of your camera as this will give it more space to write the images to the card.
- Instead of using a shutter remote, you could also use an intervalometer to take a large number of images. The great thing about this is if you take enough images you can create a time-lapse video with all the frames.
Conclusion
As I mentioned at the start of this article, these techniques are a bit controversial, as the long exposure isn’t being created naturally. However, if you don’t have any ND filters or cannot afford a 10-stop filter then they will help you achieve the look you are after.
It doesn’t work with everything, so I still believe ND filters are essential in photography, but I always find it fascinating what your camera and editing software are capable of.
About the Author
Kirk Norbury is a nature photographer and cinematographer based in Ayr, Scotland. You can find out about the workshops he runs and view more of his work on his website.
Related articles
How To Use Focus Stacking For Landscape Photography
How Polarising Filters Can Transform Your Photography


