Pete Hutchinson shares three methods to create time-lapses for your video projects
Few modern video techniques have been used as much as the time-lapse. Despite the popularity of the technique they are still very fashionable and have the power to enhance a video massively. Time-lapse is perfect for capturing slow-moving objects like clouds or even an artist painting a picture, then speeding them up into a few seconds of video. This effect is made by filming a scene for a few minutes or hours and speeding it up in your editing software.
The beauty of time-lapses is how simple they are to create. There are a couple of different ways to make a time-lapse, and in this blog post we’ll look at three techniques to get you going.
Technique 1 – Video

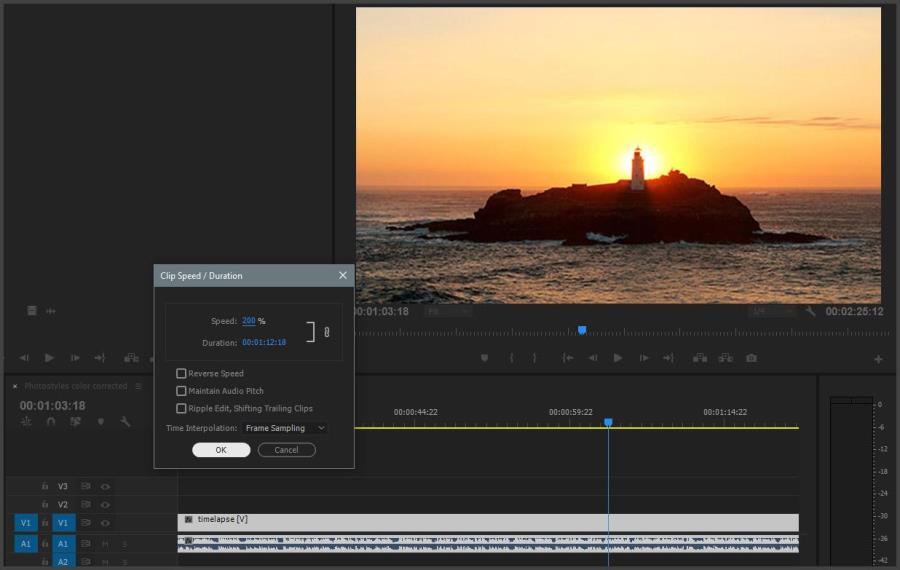
The easiest way to make a timelapse is to simply film your scene for a certain amount of time and then speed this clip up in post-production. Generally a few minutes is the minimum amount of time you want to be making into a time-lapse. The key rule – and this is true for all three techniques – is to use a sturdy tripod, as any shake or vibrations in your video will be amplified when it’s sped up.
Calculating the duration of your time-lapse is easy with this method, as you speed up your clips in percentages. A 10-minute video clip sped up by 200% will end up being a 5-minute video.
Technique 2 – Intervalometer

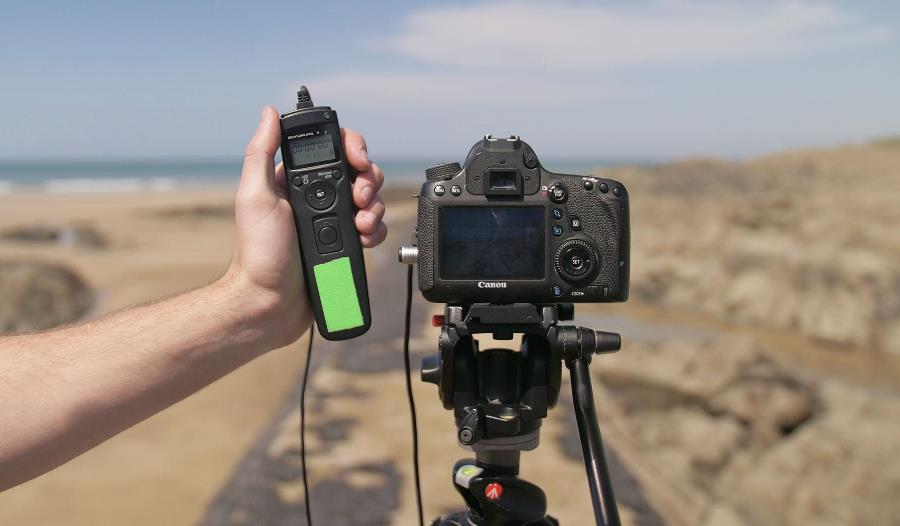
The second technique is slightly more advanced but can result in much more professional-looking footage. The key is a device called an intervalometer. This accessory plugs into your DSLR camera and allows it to take images with consistent intervals between them. In post, these images can be strung together to make a smooth-looking video time-lapse.
Interval: How long you want to make your time-lapse will determine the interval you set between the images you capture. For example if you are filming a five-hour sunrise, you could use an interval of one minute between captures. If you are recording something that moves faster (like a crowd of people) for just a few minutes, you could use an interval of 10 seconds between each photo.
Format: This will really depend on how on how much you want to push your footage in terms of the colour grade when you get into the edit. If you shoot JPEG rather than RAW, you’ll take up less storage space, but the compressed format will mean you can’t push it too far. If you want full flexibility and are fine with the extra storage space requirements, shoot RAW.
ND filter: An ND (neutral density) filter can give fantastic results. It blocks out light into the lens, meaning you can shoot at slower shutter speeds and add motion blur to the moving subjects in your images. This can give the finished time-lapse a smoother look.
Duration: If your project is in 25 frames per second, you will need to take 25 images to fill that one second. So to create a 5 second time-lapse you will need 125 images. There are plenty of time-lapse calculators online if you need some help.

Merging the images: Now you have hundreds of images, you need to string them all into a video clip. This is easily done on Adobe Premiere Pro by opening the import window, selecting the first image of your time-lapse, ticking the “Image Sequence” box, and then importing. Your timelapse should now be imported as a video file ready to use.
Technique 3 – Hyperlapse

Creating a hyperlapse is a tricky thing to do – there are many aspects that are easy to mess up – but with these pointers you should be on your way to creating something special.
A hyperlapse is a time-lapse with moving shots; for example, a sliding camera motion from left to right. For this technique we’ll be using the intervalometer and physically moving the tripod between each image taken. Here are a few things to look out for when making a hyperlapse.
Intervals: Set the intervals so that you have enough time to move the tripod in between each image (20-30 seconds works well).
Tripod movement: The key ingredient to a hyperlapse is the camera movement. To get smooth-looking motion, you want to set up your tripod on level ground then decide on a distance to move it between each image.
A good way to measure distance is with your feet; a whole foot or half a foot’s distance looks quite natural. You also want to move the tripod in a smooth and consistent direction to avoid creating nauseating movement. Finding a guideline on the floor, like paving slabs or a curb, will help you create smooth movement.
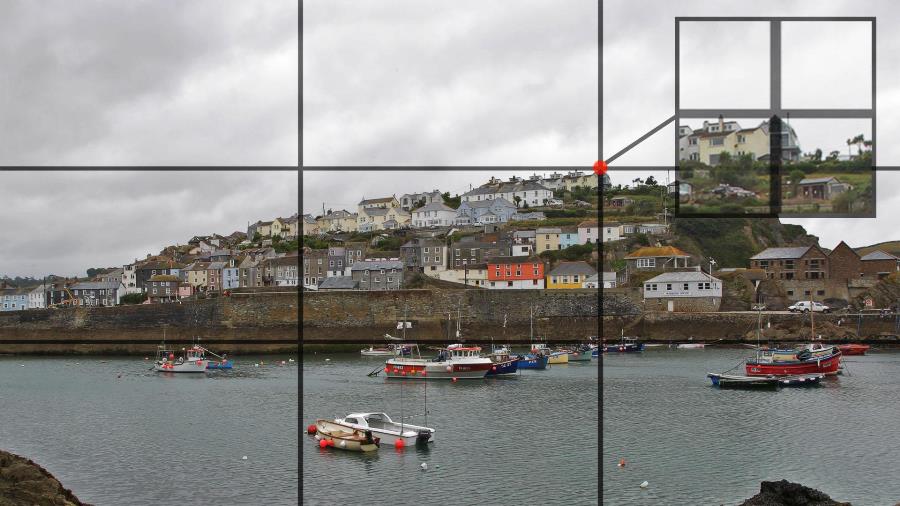
Reference point: One of the most important factors is having a reference point. This is a part of your image you always frame in the same place for every shot as the camera moves, meaning your time-lapse stays stable and doesn't jitter.
A good way to line up a reference point is to use the grid on your camera’s LCD screen. In the image above, you can see the framing has been composed so the top of the house is lined up in the upper-right cross-point of the camera’s grid. If you make sure this remains the same for every photo, the final time-lapse should come out smoothly.
Extras: An ND filter can once again be an asset here. You should be careful you have enough room to move your camera and tripod the direction you want it to go, and don’t forget to check your memory card and battery are ready to go before you start. Stops any unwanted drama.
Hopefully these techniques will help you create some exciting time-lapses!
About the Author
Pete Hutchinson is a videographer and photographer based in London. Follow him on Instagram. He also runs Outsight Creations, a small production team specialising in the creation of travel and adventure themed content.
Related articles
How to Create A Day To Night Time-Lapse Video
Self-Shooting a Short Film with the Lumix GH5 and XLR Adapter
Adventure & Travel Filmmaking – Why Jon Scott Uses the Panasonic Lumix GH5