Photographing the night sky is a truly fascinating experience, and there's never been a better time to venture out and capture some unforgettable night-time shots. Gazing up at the vast expanse of stars is a humbling reminder of how small we truly are. In this article, you'll find some of our best tips for those new to astrophotography and how you can create stunning photographs of the night sky, no matter where you are.
It's easier than you might think, and with a few simple tricks, you'll soon be able to capture beautiful night sky photographs.
Equipment
If you are new to astrophotography, all you need is four things to start capturing images of the night sky:
1. Camera
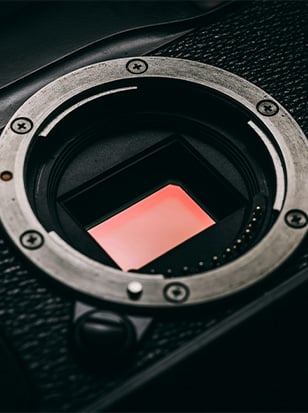
You don’t need a top-of-the-range professional camera to photograph the night sky but several features are essential or highly advisable if you're shopping for a camera to capture the night sky. Key things to look out for are:
High ISO sensitivity: The more sensitive a camera's sensor is to light, the better it'll be at capturing the finer points of the night sky when light is harder to come by.
A larger sensor (ideally full frame): Physically larger sensors can spread their pixels over a larger surface area, which means less image noise and a cleaner final shot. This means cameras with full-frame sensors often produce much better results in low light than those with smaller sensors.
A rugged, weatherproof build: When shooting the night sky, you will of course be outside and this means you're at the mercy of the elements. A camera with a solid, weatherproof build will be much more robust in these conditions, ensuring you can keep shooting for longer.
Here are a couple of our favourites. For more options of the best cameras for astrophotography, you can check out our buying guide here.

Sony A7 III Digital Camera Body
The Sony A7 III Digital Camera Body is the third iteration in the game-changing Sony A7 range. It comes upgraded with a back-illuminated 24.2-megapixel Full-Frame Exmor R CMOS imaging sensor, and the reinvented BIONZ X processing engine. The camera facilitates 4K HDR video capture and comes with 15-stops of dynamic range. Furthermore, it is capable of shooting 10fps, offers a fantastic ISO from 100-51200 as well as 5-axis image stabilisation all in a stylish, compact mirrorless system camera body.
£899.00 View
While not the newest of Sony’s A7 mirrorless camera series, the A7 III remains a sophisticated and highly reliable camera for a whole host of applications; including, astrophotography. Its high-resolution, full-frame sensor and high-ISO performance mean it does well at producing detailed, noise-free images.
The Canon EOS 6D Mark II is another not-so-new camera but again, offers excellent performance at all sorts of photography. This DSLR model essentially ticks all the boxes you could need for photographing the star i.e. a full-frame sensor, high ISO range and as a Canon camera, you’re open to the huge variety of EF lenses.
2. Wide-angle lens
Speaking of lenses, the night sky is huge, so you want to capture as much of it as you can. Most astrophotography is taken with wide or super wide-angle lenses (usually with a focal length of 14mm or 16mm) and preferably one with a fast aperture; around f2.8. Which lens you choose will depend on your camera setup, but here are a couple of suggestions based on the cameras we've already picked out. Don’t see your camera make? Check out our guide to the best astrophotography camera lenses here.
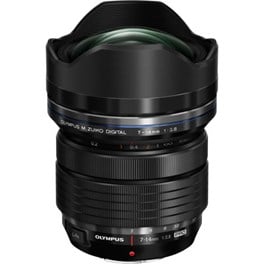
Olympus M.Zuiko Digital ED 7-14mm f2.8 PRO Lens
Save £125 with code OLY125
The Olympus 7-14mm f2.8 PRO M.ZUIKO Digital ED lens is the first wide-angle Micro Four Thirds zoom in the M.ZUIKO PRO series. The lens has a compact, lightweight and weatherproof build, as well as the very best optical construction to deliver excellent results. Additional features of the Olympus 7-14mm f2.8 PRO M.ZUIKO lens include a manual focus clutch, and an L-Fn button on the base of the lens.
£1,049.00 inc. Cashback View
While an expensive option, the price is warranted. This lens is prized among astrophotographers because of its optical performance, wide constant aperture and simply superb build quality. However, a thought; this is an OM system lens, built for Micro Four Thirds cameras, which aren’t the standard go-to for astrophotography. But that hasn’t stopped many people from getting stunning results!
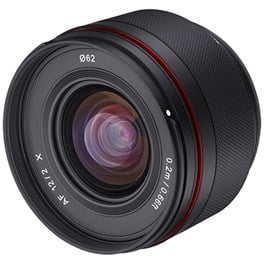
Samyang AF 12mm f2 Lens for Fujifilm X
As Samyang’s first AF lens specific to Fuji X-mount mirrorless cameras, the Samyang AF 12mm f2 delivers outstanding image quality and a vast 99.1° ultra-wide field of view. This is incredibly beneficial for landscape photographers, whilst the large-diameter aperture, 20cm minimum focusing distance, and newly integrated AF performance suit high-end portrait photography and video productions.
£339.00 View
This Samyang AF 12mm f2 for Fujifilm X is a cheaper alternative than other options for Fujifilm cameras, and actually, it offers a wider field of view than most of their lenses! This lens offers a huge 99.1° ultra-wide field of view with pin-sharp images from edge to edge, which is ideal for astrophotography.
3. Cable release or intervalometer
To take effective astrophotography, you have to take long exposures; where slight movements ruin an image. Using a cable release means that you don’t need to touch the camera, which helps to avoid that camera shake. An intervalometer is also a useful piece of equipment if your exposures are over 30 seconds long (usually when creating time-lapses of the night sky.)
4. Tripod
A good, strong tripod with a solid head on top is essential for effective astrophotography. As mentioned, slight movements can cause camera shake, potentially ruining your images. A cable release reduces the risk of this from your hand but a decent tripod will reduce movement caused by the elements. We have many options but you can see more of our top picks here.
Other accessories…
While these are the four crucial bits of kit, there are plenty of other accessories that can be hugely useful for astrophotography. For more, check out the Wex guide to the best accessories for night-sky photography, which gives you a few ideas of things you may find useful when out in the field.
Method
Where and when
The UK is notorious for light pollution, but that shouldn't discourage you. You’re going to want to find a location with minimal light pollution and depending on where you live, this might be straightforward or require a bit of travel to more remote areas for the best results. A useful tool is the Blue Marble Navigator, which identifies the darkest areas around the world.
While it's possible to photograph the night sky throughout the year, the best photos of the night sky are taken on clear nights without clouds or a bright moon. Despite what you might think, the moon can hinder or help your astrophotography. A full moon can be too bright and obscure the stars, but when it's in its early phases, the moon's light can help balance exposure by highlighting details in the foreground.
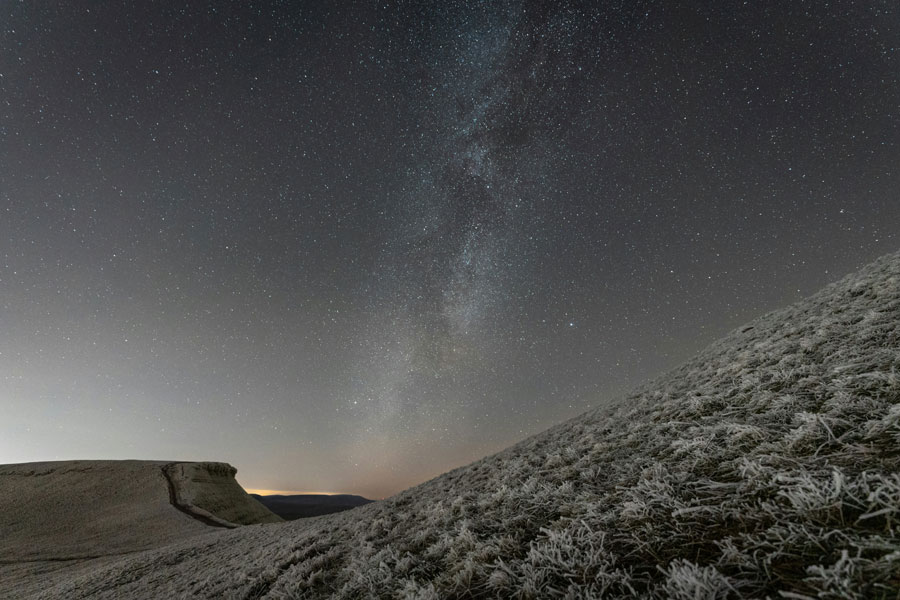
Photo by Marcus Woodbridge
How to set up the shot
Step one is to arrive at your location before it gets dark. This way, you'll have time to wander around and find an area that allows for the most pleasing composition (which becomes much harder once it's fully dark). Set up the tripod, ensuring it's firmly planted into the ground for stability, and switch the camera to Manual exposure mode (generally labelled “M.”) Adjust the lens to focus on infinity by turning the focus ring until the ∞ symbol appears. Next, you need to choose the best shutter speed for your lens and camera. For this, you can refer to "500 Rule":
The 500 Rule
If you leave the shutter open too long when photographing the night sky in a single exposure, the earth's rotation will create star trails. If you'd rather capture the stars as stars (rather than trails), you can use this rule to calculate the most appropriate shutter speed based on the lens you're using and your camera's crop factor. Simply take the number 500 and divide it by the focal length of your lens, before multiplying it by the crop factor of your camera's sensor if it isn't full frame. Here's a table showing the longest exposures you can achieve before seeing star trails in your image:
Set the camera to its widest aperture, such as f2.8, and choose the appropriate shutter speed. The ISO setting needs to be high to ensure your camera’s sensor picks up on all available light; start with around ISO 1000. This will depend on location and if you’re in an area with minimal light pollution, increasing to ISO 3200 may give better results. Next, connect a cable release, take a test shot and review the image to make sure you like your composition and the shot is sharp. Once you’re satisfied, you're ready to start capturing the night sky.
Star trails
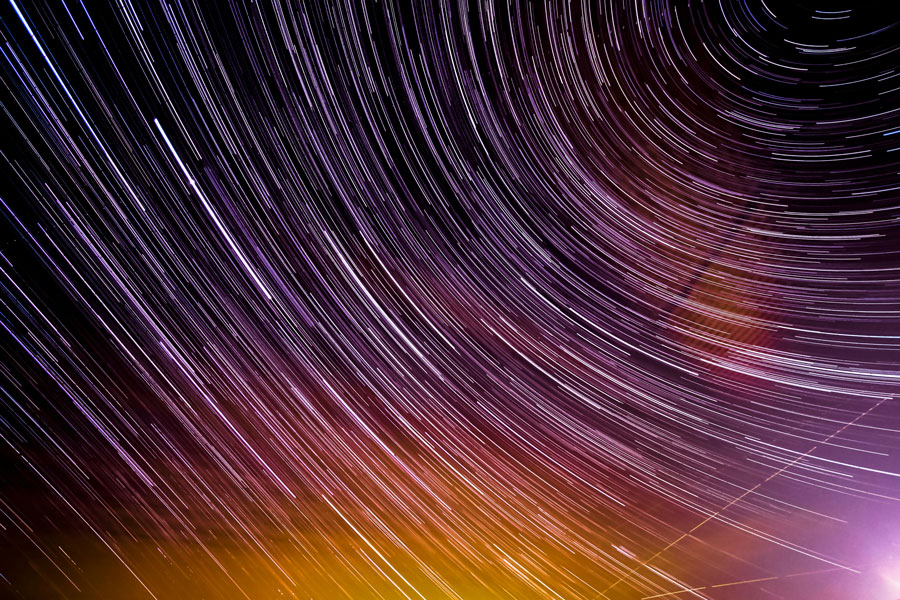
Photo by Eléonore Bommart
If you want to take your night sky photography to the next level you could try creating star trails. Throughout the night the Earth rotates, making the stars look like they’re rotating in a clockwise motion around the Polaris (the North Star), when in reality, they don’t move at all; it's the Earth which rotates on its axis). There are specific guides on how to capture this in camera but if you point your camera directly at the North Star, you should be able to see it.
There are two ways you can create a star trail with your camera: one long exposure or a stack of multiple shorter exposures stacked together.
A Single Long Exposure
For capturing star trails in one long exposure, you need to set your camera to “bulb” mode, your ISO to 200 and open your aperture as wide as possible, ideally to f2.8. Set your lens to manual and manually focus to infinity. Then take a test shot of about 10 minutes to check your exposure and composition.
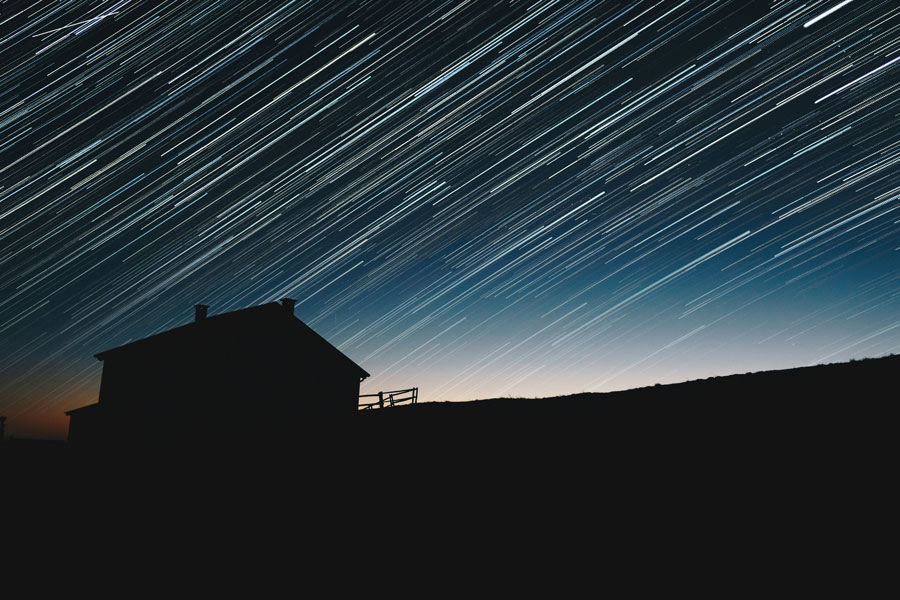
Photo by Samuele Errico Piccarini
If everything looks good, lock the shutter and leave the camera for one to three hours to capture the effect. Capturing a perfectly exposure image can be difficult, but incredibly rewarding. However, if you are new to astrophotography, you may find the next technique easier to begin with.
Multiple exposures stacked together
This method is easier and often produces the best results. The basic premise is that you take shorter exposures (using the 500 Rule as a guide) and blend them using software like StarStax or Adobe Photoshop. There are plenty of tutorials on YouTube to help with this process.
Once the camera is set up and you’re happy with the composition, start the shooting sequence with a remote shutter release, locking it to continue taking images until you're ready to stop. This method gives you greater control over exposure and as a great bonus, you can create a timelapse video with the resulting images.
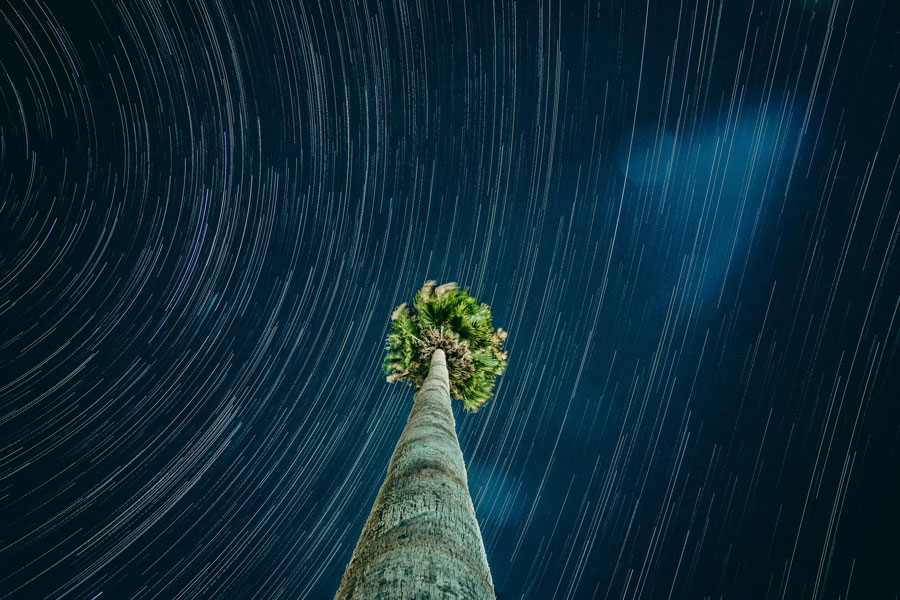
Photo by insung yoon
At first, photographing the night sky may seem simple, and in many cases, it can be. However, if you want to capture the best images of the night sky, it will take a lot of practice, patience and perseverance. You need to be dedicated and committed to long nights and a willingness to get back on the horse if a long 15-minute+ exposure doesn’t work out. But remember, practice makes perfect and you will not master it overnight. Above all, even if the images do not work out at first, enjoy the process and the beauty of the night sky above you.
If you would like to know more about what astronomical events are going to happen this year so you can plan your shoots, be sure to check out our Astronomy and Astrophotography Calendar. You’ll find a comprehensive calendar of events along with other tips and equipment guides.
FAQs
What equipment do I need to start astrophotography?
Getting started with astrophotography requires a few essential pieces of equipment, but you don't need to break the bank to begin with. At the very least, you'll need a DSLR or mirrorless camera with manual settings, a sturdy tripod to keep your shots stable and a lens with a wide aperture (f2.8 or lower is ideal) for capturing as much light as possible.
What settings should I use for astrophotography?
To capture the best night sky images, you need to manually adjust your camera settings. Start by setting your camera to manual mode. Choose a wide aperture, a high ISO and a slow shutter speed to capture enough light from stars. Experimentation is key, so don't hesitate to tweak these settings depending on your location and the sky's conditions.
Can I do astrophotography with a smartphone?
Yes, you can shoot astrophotography with a smartphone, especially modern phones that have manual controls and night modes. Use a tripod or another stable surface to avoid camera shake during long exposures (you can even just prop your phone up with a book). While smartphone cameras might not match the quality of dedicated cameras, they can still produce impressive images of the moon, star trails and even the Milky Way with the right technique.
How do I focus my camera for astrophotography?
Getting a sharp image of the stars can be challenging but the best practice is to set your lens to manual and adjust the focus to infinity. You can use your camera’s live view mode to zoom in on a bright star and adjust the focus until the star appears as small and sharp as possible. After focusing, be careful not to touch the lens to avoid accidentally defocusing.
What are the best locations for astrophotography in the UK?
There’s a lot of light pollution out there which can be a problem for astrophotography. However, there are various dark sky locations in the UK including Exmoor, Brecon Beacons and Northumberland that are recognised as “dark sky reserves” due to minimal light pollution and expansive views of the night sky. But if you’re not close to these locations, the next best option is to simply get away from city lights. Go somewhere rural or near the coast.
Sign up for our newsletter today!
- Subscribe for exclusive discounts and special offers
- Receive our monthly content roundups
- Get the latest news and know-how from our experts