By this time, you’ll have read part one of our How to Shoot Film series - the cleverly titled and brilliantly written Choosing a film camera.
So, let’s assume that you’re holding a much-loved, old-school camera of some description. Whether you’ve opted for something fully-manual, a late 90s technological wonder or something from our Lomography range - your inevitable next thought will be “very nice. How do I use it?”
Which camera film is right for me?
Perhaps more now than at almost any point in time – ironically including when film was in its ascendency – film shooters have got it made when it comes to choosing a film. Some of the classics (many of which you can find here at Wex) – Kodak Portra, Gold, Ilford’s stellar range of black and white films – have stood the test of time (if not the vagaries of the supply chain, of which more later) – while a host of upstarts, both in colour and monochrome emulsions mean you can imbue your film photography with virtually any style or mood you want.
One of the huge appeals of film photography – for this photographer at least – is that colour and tone are “baked in” much more than it is when you shoot a digital image. That means you’ll need to choose your rolls of film based on what you want your images to look like, because while digital photography might allow you to make an image look like almost anything, the images you take from a roll of film are – more or less – in their final form as they leave the lab. Grainy, black and white might suit one occasion, whereas warm and friendly might suit another.
We can offer you two lines of advice here – if you’re feeling flush, don’t mind missing a few shots and prize first-hand knowledge above all else – we’d suggest getting out there and shooting a few different rolls to get a feel for what you love and what you don’t. It was this scientific approach that led me to conclude that Kodak Gold – an admittedly cartoonish, nostalgic, warm film, is my preference over the colder, more detached-feeling Fuji C200.
The second, cheaper, less fun, way of scoping out which films you should be putting through your new pride-and-joy, is to head to a few photo-sharing sites. Instagram is the big one, but also the worst for figuring out what you should be buying, thanks to its low-resolution images and hopeless search engine. Head to either 500px or Flickr (remember them?), pop the name of the film you’re researching into the box, and you’ll find a huge community of film photographers keen to share their best-looking pictures. It’s a great way of researching and joining in, and you’ll also pick up a few tips and tricks when it comes to developing and scanning.
For absolute beginners, allow us to recommend a few rolls of Kodak Gold 200 and a few rolls of Ilford HP5 400 – both flexible emulsions with a decent amount of exposure latitude which are tolerant to push development (of which more in a bit), and which won’t break the bank like a roll of Portra will.
Kodak Professional GOLD 200 120 Film (5 Pack)
Kodak Professional GOLD 200 film is back! This medium format film is perfect for beginners and professionals alike working on a budget. As a daylight-balanced colour negative film, GOLD 200 offers a versatile combination of vivid colour saturation, fine grain, and high image sharpness. Available in a 5 roll multipack, this is the ideal affordable film for portraits, travel and everyday snapshots.
£42.00 View
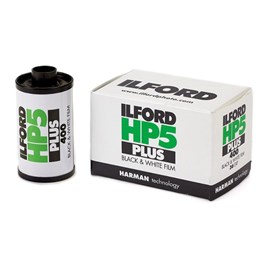
Ilford HP5 Plus 35mm film (36 exposure)
High sharpness, fine grain, and exposure tolerance – these are some of the best qualities of the Ilford HP5 Plus 35mm film (36 exposure). This black and white medium speed film is focused on capturing scenes in various lighting conditions. Its ISO 400 makes the film suitable for capturing high-detailed subjects indoors and outdoors for journalism, documentaries, travel, sports, action, and more.
£8.25 View
What does ISO mean on camera film?
Good question. For photographers who have built up a bit of experience with digital photography, ISO on a roll of film means exactly the same as it does in a digital camera: the lower the number, the less sensitive the film is to light - which means you’ll need either longer exposures or bigger apertures to get a well-exposed result.
So, a roll of 200 ISO film might be a great choice for a holiday in the sun, while a roll of ISO 800 film will be better suited to a late-finishing music festival or covered skatepark. Of course, the drawbacks to high digital ISO are present with film – higher ISOs mean more grain. It’s worth having a few rolls in your fridge so you can load your camera differently depending on how much light you’re expecting to work in. And, don’t forget that we’ve all been spoiled by two decades of high-quality digital photography – changing ISO on a modern mirrorless camera or DSLR is the work of a few button presses. The only way to change ISO on a film camera is to either abandon the roll you’re halfway through, or start developing film yourself.
All of which brings us to…
What is pushing film?
In development terms, the question of whether camera film can be pushed or pulled, gives film photographers something nerdy to talk about on photo walks and/or in the pub. If you’re new to all of this, even if you don’t have a clue what you’re talking about, just say something like, “yeah, you can push it two stops really beautifully” - you’ll still be welcomed into the film community with open arms.
If you’d actually like to know what you’re talking about, you should know that pulling and pushing film means developing it either a lower or higher ISO than it’s rated for. So, if you’re pushing a roll of ISO 200 film by one stop, you’ll be developing it at ISO 400.
Why? It lets you treat a roll of film as though it’s more sensitive than it actually is. So, if you plan to push a roll of ISO 200 to ISO 400, you’ll be metering a stop faster than you would otherwise - allowing you to shoot, for example, 1/125th of a second instead of 1/60th – which could make a significant difference when it comes to sharpness.
Pulling, on the other hand, goes the other way – your film might be rated at ISO 200, but you’ll be shooting as if it was rated at ISO 100. Theoretically, this gives a cleaner image or access to longer shutter speeds, but the image quality gains are generally minimal. Mr advice: don’t bother.
Push or pull development is something you need to think about when you load your film – if you’re getting your film developed at a lab, they’ll be pushing or pulling the whole roll - you’ll need to decide how you’re going to develop your film when you load it. You can’t change ISO mid-roll. You can normally mark on the canister if a roll has been shot at the “wrong” ISO – do that so you don’t forget to instruct your developing lab accordingly.
Should I buy expired camera film from eBay?
Yes. Well… maybe.
Camera film deteriorates with age. This is why film canisters have an expiration date stamped on them. Still, that didn’t stop some wizened soul from loading a roll of expired film and loving the random, hue-shifting results they got. And now, shooting expired film is all the rage! So much so that if you go hunting for job lots of expired film on eBay you’ll frequently find that they’re selling for the same, or even more, than equivalent rolls of unexpired film. Fans revel in the glory of the unexpected, once-in-a-lifetime look of (some) expired film. While others (including this photographer) blanch at the prospect of shooting 36 whole frames only to find an entire roll of underexposed rubbish at the development stage.
If you’re going to experiment with expired film – and who are we to stop you? – remember you need to over-expose by a stop for every 10 years that’s passed since the film expired. So, you’d be setting your camera to ISO 400 if your roll of ISO 800 film expired a decade ago. Just remember that when you want reliable results, all of our film stock is in-date.
Where should I get my camera film developed?
The million-dollar question. Now, we don’t run a film lab (although it would be pretty good if we did - we do sell a full range of darkroom equipment here if you want to give developing a crack yourself).
There are a decent number of labs around the UK that offer convenient, competitively-priced film development. It’s always worth checking out reviews on search engines and social media to help you gauge whether people love the results they’re getting back. Look for things like decent turnaround times, (of course) the quality of the images photographers are posting, and a bit of enthusiasm on social media - these are all clues that you’re sending your beloved rolls to an outfit that cares as much as you do.
Should I scan my camera film myself?
Ah, the two-million-dollar question. It’s beyond most of us to develop film ourselves; not so much with scanning. A quick shout-out to the labs offering film scanning here – it’s not as easy as it looks, and getting a good scan from a roll of developed 35mm film requires familiarity with both your scanner and photo editing tools. You need confidence in adjusting curves and levels, being able to read a histogram, as well as having plenty of hard disk space to store the initial high-res scan before you edit it to (theoretical) perfection. I’m a bit of a digital hoarder, which means scanning a whole roll using my Epson V600 (still a beast, 13 years after its release) costs me about 18GB before exporting my images as final JPEGs.
But if you think you’ve got the chops, scanning your own film is deeply satisfying and, after a few rolls, cheaper than getting a lab to do it for you.
There are a few ways of peeling this particular banana. For photography fans, there’s the option of rigging a camera with a macro lens over a lightbox with a frame of film mounted to it. Wex sells various bits of gear dedicated to this; not least this affordable, colour-corrected Lightbox. The process is simple – mount your camera vertically over the lightbox, get your macro lens as near as you can, focus it *perfectly*, and then capture your negative frame for posterity.
Photolux A4 LED Ultra Slim Light Panel
The Photolux A4 LED Ultra Slim Light Panel is truly ultra slim with a depth of only 10mm. This A4 light panel offers a plethora of creative applications including: art work, embossing, lettering, calligraphy, photography, tracing and slides. To maintain accurate colours the lightbox is colour corrected to white daylight 5600 Kelvin. This comes in especially helpful when viewing slides. This particular light panel is A4 sized at approx. 32 x 24cm (12 x 9 inches).
£34.99 View
It’s a fun solution (if not necessarily a perfect one) – for one thing, if you’ve got 36 frames to digitise, realigning your film and/or camera each time is going to take hours, and you’ll still need to edit your images. Still, if you already own a camera with decent resolution and a macro lens, this could be a low-cost way into digitising your own film.
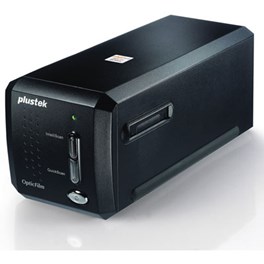
If reliability is what you’re after, you’re probably in the market for a decent film scanner. There are some great options available, from film-only options such as the Plustek 8200i SE OpticFilm Scanner, which is specifically designed for 35mm film. It’s small, it’s convenient, and it even comes with a handy-handy carrying pouch.
Plustek 8200i SE OpticFilm Scanner
The Plustek 8200i SE OpticFilm Scanner delivers the best film scanning solution for web sharing and printing and is aimed at all home users, film enthusiasts and photographers who demand the best image quality. The Plustek OpticFilm 8200i SE is a 7200 dpi scanner with state of the art illumination and optical systems designed to resolve very small differences is edge contrast. The scanner includes a built-in infrared channel which can detect dust and scratches on the surface of the original negatives and slides. This IR channel is highly effective for removal without retouching the images. All OpticFilm scanners also come with a carrying bag that can be used for transportation or storage. The Plustek 8200i OpticFilm Scanner is bundled with the latest scanning software - SilverFast NegaFix and SilverFast Multi-Exposure.
£399.00 View
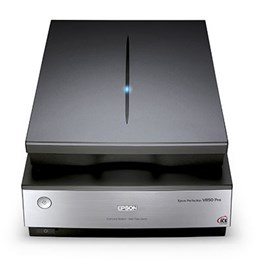
Still, it only scans 35mm film – enough for most, but if you end up well and truly bitten by the film photography bug you’ll quickly find yourself eyeing up medium format cameras, for which you’ll be wanting a flatbed scanner. As mentioned, my Epson V600 has pride of place in my photography cave, scanning both strips of 35mm film or 120 format film via its plastic film holder. If you want to go bigger still, Epson also makes the V850, which will scan up to 8x10 film when it’s placed directly on the scanning bed.
Epson Perfection V850 Pro Photo Scanner
The Epson Perfection V850 Pro is a film and photo scanner that features a dual lens system that automatically selects the optimal lens, with up to 4800dpi optical resolution for photo scanning and 6400dpi when scanning using film holders. Scan a range of film formats in sharp focus thanks to the improved quality film holders with their adjustable height control and rigid design. The V850 Pro also supports film formats up to 8x10 inch when placed directly on the scanner glass. Epson's ReadyScan LED light source has a warm up time of less than one second, so scaning can start almost instanly. Two sets of film holders means you can prepare a second set of orginals for scanning while the first is still scanning.
£859.00 View
Shooting film? Make sure to tag us @WexTweets on Twitter or @WexPhotoVideo on Instagram so we can see what you’re up to!


