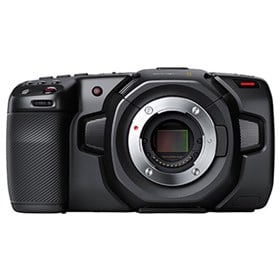
Colourist, Simon Williamson, shares his approach and thoughts on grading the BMPCC 4K’s RAW footage, used in Jade Beard’s ‘Palaces of Self-Discovery’
Jade Beard’s Palaces of Self-Discovery, graded by Simon Williamson.
I've been involved in the creative industry for a long time now. I started out in radio and music production, but eventually made a career out of something I’ve long had a passion for, film. I sold my keyboard and bought a Canon EOS Rebel T2i, and I spent all my free time learning how to shoot and edit. All that time spent on computers, learning music production, meant I picked up editing and filmmaking pretty quickly.
With the help of friends I had in the music industry, I was able to shoot and post a handful of music videos and learned how to colour grade on the job. I filmed demo reels that led to some freelance grading work for a small post-production company in Melbourne and the rest, as they say, is history…
Over the years I’ve learned all of the major non-linear editing systems [NLE], including Adobe Premiere and Final Cut Pro X, I even dipped my toes into Avid’s Media Composer. More recently, I’ve settled on doing everything in DaVinci Resolve. I’ve always graded in Resolve – it’s just my preferred choice – and with the editing capabilities it now has available, I’ve been able to do away with round-tripping.
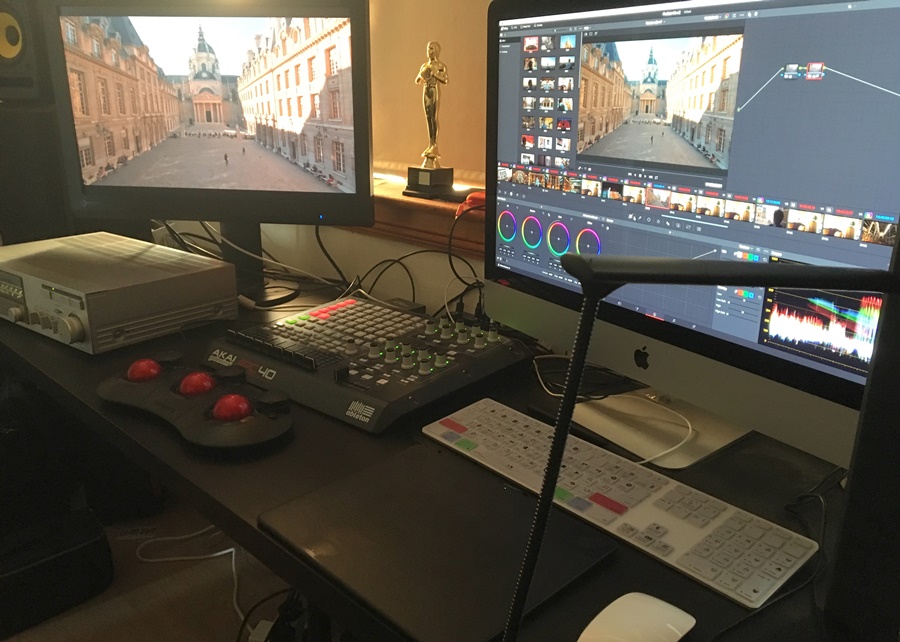
My current editing setup is a 27-inch iMac, an 8GB graphics card, and two EIZO CS240 monitors. I have a Blackmagic UltraStudio Mini Monitor, which connects the iMac to one of the monitors, and I use a Tangent Ripple and a custom midi setup with an Akai APC40 to control Resolve.
The project
I first heard about Palaces of Self-Discovery through Tim Askew, the business partner of the film’s director, Jade Beard. We share an office, and he mentioned they were looking for someone to edit a short piece made on the new Pocket Cinema Camera 4K from Blackmagic Design. When I spoke with Jade, the film was an immediate fit as it was shot in one of my favourite cities and I was keen to see what the camera could achieve.
Palaces of Self-Discovery is a short documentary that was filmed in three days around Paris. It’s about Thibaud Poirier, a self-taught photographer with a passion for architecture within urban environments. If you haven’t read it already, do check out this interview with Jade and Sam Edmonds (the director of photography).
There was a lot of media – everything was recorded in 4K cinemaDNG RAW (3:1) – so I had well over a terabyte of media files to manage. It’s something I’ve become accustomed to, but good organisation is always the key to managing media and saves you a lot of time once you’re in the edit. For this project I kept the bin structure simple, grouping the rushes by the day they were shot on.
With that done, I then set up a timeline sequence just for the interview. This helped me to visualise and begin shaping the story. All told, we had about 50 minutes of talking heads. Getting through that and then cutting it down to under four minutes was probably the biggest challenge on this project. In the end, I think we got through seven edits to reach a final cut that Jade was happy with.
Editing is a tough yet rewarding process. On this project, I had to keep the piece straight to the point, while still giving it room to breathe and tell a story. When filming in Paris, you want to add as much of that beautiful-looking city as possible, so it’s really about finding that balance between talking heads and B-roll.
The grade
For the grade, my brief was to add some understated atmosphere and soul to the piece. I wanted to keep the grade as natural as possible and colour the scenes in a way that complemented them as much as I could. As always, it’s striking a balance between what you’re creating and the director’s vision. However, with Palaces of Self-Discovery Jade and I were on the same page straight away.
The shots were all nicely exposed by Sam, and I noticed very little noise in the shadows or the night footage. I loved working with the compressed RAW files to get maximum creative control, while saving on storage requirements (the best of both worlds). Having footage that is shot well in the first place is the most important thing, but knowing you’ve retained all that information and detail gives you more creative control during post. For the unfamiliar, a compressed 3:1 CinemaDNG sequence, which is 12-bit, is only marginally larger than a 10-bit ProRes 4:4:2 HQ file.
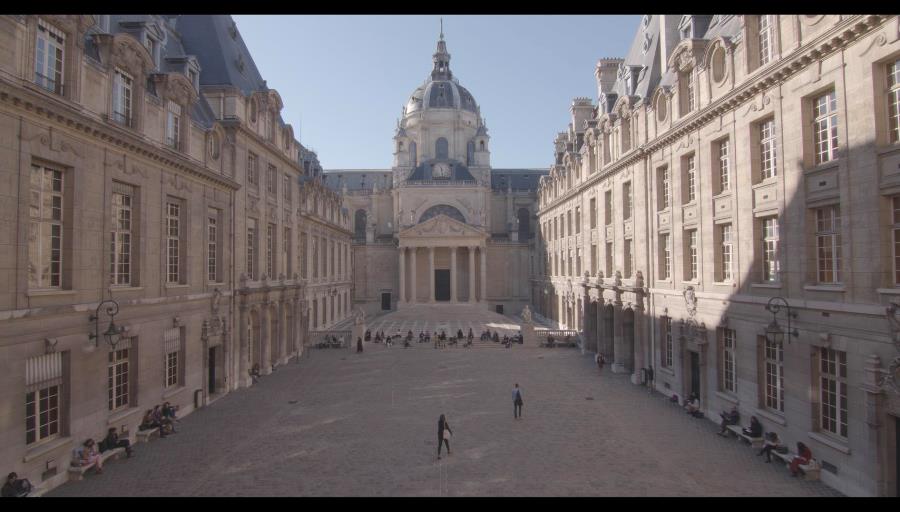
The above frame is a good example of what I was able to do with the grading of the footage. Straight out of the camera it’s a pleasing image, you have the sunlight reflecting off surfaces and large areas of shadow to the right side of the building.
In the RAW tab (in Resolve) I kept the white balance as shot, left the colour space in Blackmagic Design so I could control everything and set the gamma to the new Blackmagic Pocket 4K film setting. I also ticked the Highlight Recovery checkbox, in case we lost any of the reflections from the wall.
If I haven’t had footage in advance to start working on or if time is very limited, I find it useful to use a LUT to get me in the right ballpark for a grade. In the timeline Node menu, I’ll go through a selection of LUTs to give me a starting reference point for grading. For this project, I liked the overall look of the Osiris Prismo LUT, although in my opinion it looked totally overcooked.
In the clip nodes, I created my first node and balanced out the footage for the whole edit. This is balancing the colour with the colour wheels, adjusting lift, gain and offset. After I’d balanced all the clips, I went back to my timeline node and turned my LUT node on. I turned the key output down to 0.800 as the effect was far too strong and not very nice. Everything looked much better, but I needed to do another pass on the whole edit to fine-tune the look of every individual shot. On this particular shot I added another node and took the highlights down, and on the final node I did some work in the hue/saturation curves.
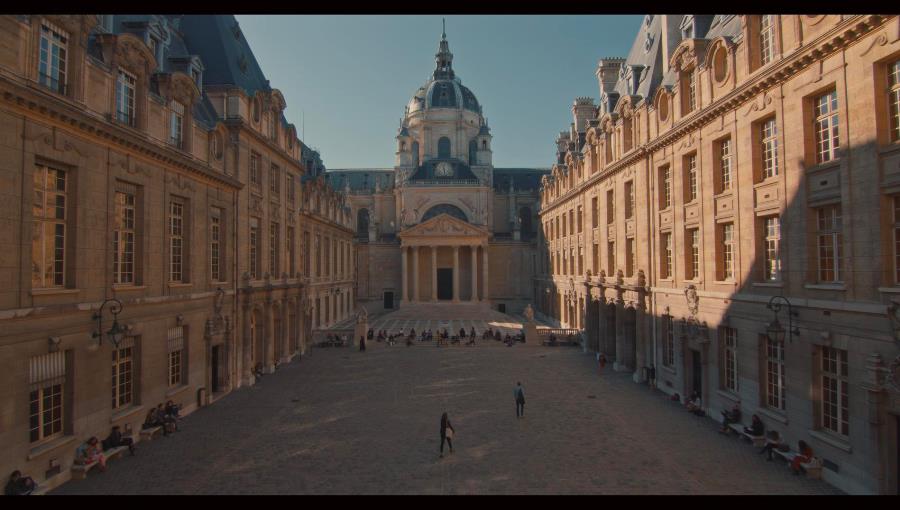
The original clip didn’t look like it was shot at sunrise or sunset, so I wanted to add warmth to give it a golden hour appearance. I thought the detail in the area of shadow was retained really well – there was no noticeable noise added from the grading. Once I had the overall look right, I then fine-tuned the grade shot by shot. A lot of this is instinct; I go with what feels right.
My thoughts
The editing experience has improved a lot, and I found it a very smooth transition to edit in Resolve. Once you learn your shortcuts, it’s as quick as any of the other editing platforms out there. My favourite tool has to be Resolve's Scene Cut Detection – it saves lots of time when people send me master videos. Optimized Media is another lifesaver if you’re not on a fast computer. It does away with the need for proxies, and I can toggle the original media on and off at the click of a mouse.
When you couple Resolve with those RAW files from the Blackmagic Pocket Cinema Camera 4K, you really do have a very powerful filmmaking setup. And, better yet, you get the full version of Resolve for free with the camera, so users have no excuse not to try it out!
About the Author
Simon boasts seven years of professional industry experience as a colourist, director of photography/camera operator and editor. To see more of his work, visit his website.
