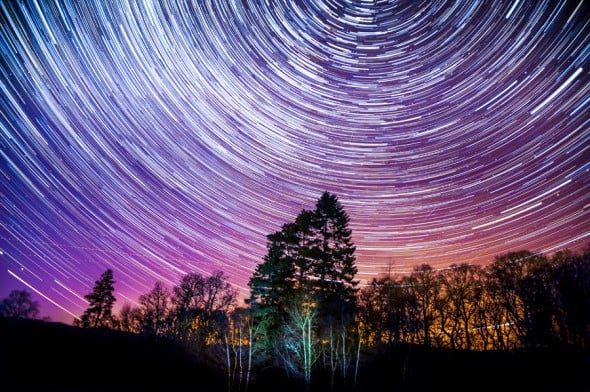
Kirk Norbury explains how he created this striking star-trail image in Scotland’s Galloway Forest.

The Galloway Forest in Scotland is the number one place I go to take shots of the night sky. It’s an area with very low light pollution, which is not only perfect for seeing more stars but also means less of an orange glow in images. During a cold evening in March 2013, I decided to venture out in the cold to photograph the stars as the sky was clear and the moon was nowhere to be seen. I wanted to set up one of my cameras for a static time-lapse shot that I could also turn into a star-trail image, something I really enjoy doing. By taking a large number of photographs and combining them together, you can create an image that shows the movement of stars as the earth rotates on its axis, otherwise known as star trails.
For this image I used the Nikon D3 DSLR with the Nikkor 24-120mm f/3.5-5.6 IF-ED VR set at 24mm to get as many of the stars in the frame as I could. I wanted to document the movement of the stars across the sky but also have something in the foreground to make the shot feel a bit more three-dimensional. I set my camera on its tripod and started to compose the shot. This was quite difficult as I couldn’t see anything, although I brought a torch with me to light up the trees. Once I’d finished, I placed the torch on the floor and pointed it towards the trees.
I set the lens to focus infinity to get a good range of sharpness across the scene, before setting the lens to its lowest aperture (f/3.5) to let in enough light to illuminate the night sky. Next, I raised the camera’s sensitivity to ISO 3200, making it more sensitive to light, before setting the shutter speed to get an even exposure at that aperture. This came in at 25 seconds, which is what I try to stick to for night photography (depending on the lens) as it tends to work the best for me.
After getting all my settings right, I needed to attach an intervalometer so the camera could keep taking pictures without me having to touch it. As I was setting up this shot for a time-lapse as well as a star trail image I wanted to capture a large amount of images, so I set the intervalometer to take 250 Raw images. This would give me enough images for 10 seconds of footage and would also show a large movement of the stars across the sky. After one final check of my settings and focus, I started the process on the intervalometer.
After taking all the images, I uploaded them to my Lightroom catalog and placed the shots into their own folder to keep them separate from other images. I then picked one of the images around halfway through the sequence to edit; I did this because the middle shot will have the average exposure for the whole sequence, making it a good place to start when editing. For this shot I played with contrast and clarity to bring out more detail in the stars and I also used Lightroom’s Noise Reduction option to bring down the noise around the trees. Noise is always a downside to photographing the night sky but it can be easily removed with most editing applications.
After I finished editing the shot, I copied all my settings and pasted them onto all the other images so they all looked the same. I then exported all the images as JPEGs into a folder on my desktop, before opening an application called StarStax. This takes all your images of the night sky and stacks them on top of each other to create an image with the star-trail effect.
Getting this image was tricky. I was working in complete darkness and it was very cold, and, as the weather started to change and clouds began to move in, I knew I only had one chance to get it right. Getting the composition correct was key, as I wanted to get a balance between the foreground and also the stars. This shot was taken nearly two years ago when I was only really just starting to photograph the night sky, but I learnt so much from those nights in the cold that I’ve applied those skills to my photography ever since.
About the Author
Kirk Norbury is a nature photographer and cinematographer based in Ayr, Scotland. You can find out about the workshops he runs and view more of his work on his website.
